How to Build a Complete MLOps Pipeline: Automated Machine Learning from Training to Production

Building a Complete MLOps Pipeline: Automated ML from Training to Production
A practical guide to building an end-to-end machine learning system
Introduction
Machine learning models in Jupyter notebooks are great for learning, but production systems need much more. This article shows you how to build a complete MLOps pipeline that automates everything from model training to serving predictions.
What you’ll learn:
- How to automate ML training with Airflow
- How to track experiments with MLflow
- How to serve models with FastAPI
- How to deploy everything with Docker
By the end, you’ll have a working system that trains models automatically, tracks all experiments, and serves predictions via a web interface.
The Problem
Most ML projects face these challenges:
❌ Manual training – Running scripts manually every time
❌ Lost experiments – Forgetting which model performed best
❌ Deployment struggles – Models work locally but fail in production
❌ No versioning – Can’t rollback to previous models
❌ No monitoring – Don’t know when models stop working
Solution: MLOps – Apply DevOps practices to ML workflows.
What We Built
A complete ML system for iris flower classification with:
✅ Automated Training – Models train daily without manual work
✅ Experiment Tracking – Every training run logged automatically
✅ Model Registry – All model versions stored and managed
✅ REST API – Serve predictions via HTTP endpoints
✅ Web Interface – User-friendly UI for predictions
✅ Full Containerization – Deploy anywhere with Docker
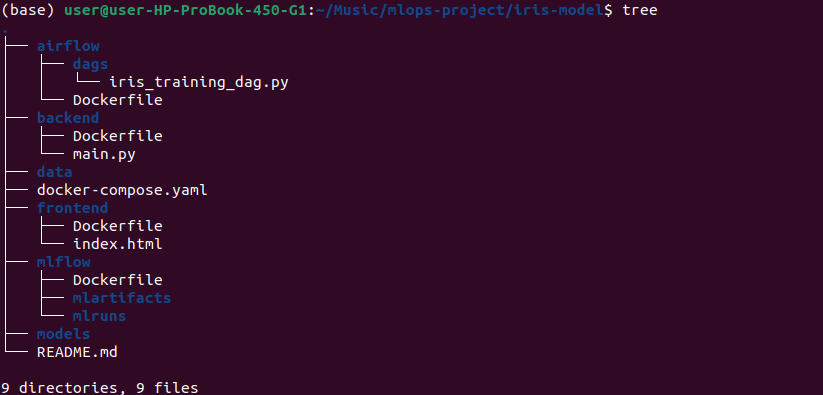
Architecture
The system has 4 microservices:
┌──────────┐    ┌──────────┐    ┌──────────┐    ┌──────────┐
│ Airflow  │───▶│  MLflow  │───▶│ FastAPI  │───▶│ Frontend │
│  :8080   │    │  :5000   │    │  :8000   │    │  :3000   │
└──────────┘    └──────────┘    └──────────┘    └──────────┘
   Trains         Tracks         Serves          Displays
   Models        Everything      Predictions      Results
Services:
- Airflow – Schedules and runs training pipeline daily
- MLflow – Logs experiments, stores models
- FastAPI – REST API for predictions
- Frontend – Web UI for users
Technology Stack
| Component | Technology | Why |
|---|---|---|
| Orchestration | Apache Airflow | Automate workflows |
| Tracking | MLflow | Log experiments |
| Training | Scikit-learn | Train models |
| API | FastAPI | Serve predictions |
| UI | HTML/CSS/JS | User interface |
| Deployment | Docker Compose | Run everything |
Getting Started: Step-by-Step Setup
Prerequisites
Install these first:
- Docker Desktop (version 20.10+)
- Docker Compose (version 2.0+)
- Git
- 8GB+ RAM available
Verify installation:
docker --version
docker-compose --version
git --version
Step 1: Clone Repository
# Clone the project
git clone https://github.com/rjshk013/mlops-project.git
cd mlops-project/iris-model

# Check files are there
ls -la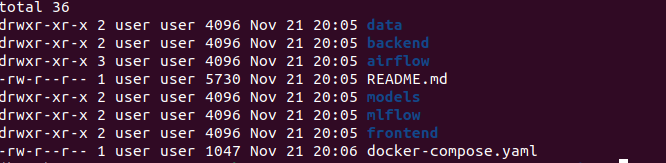
Step 2: Create Required Directories
This step is critical – don’t skip it!
# Create MLflow directories
mkdir -p mlflow/mlruns mlflow/mlartifacts

# Verify
mlops-project/iris-model
Why needed: MLflow needs these directories to store experiments and models.
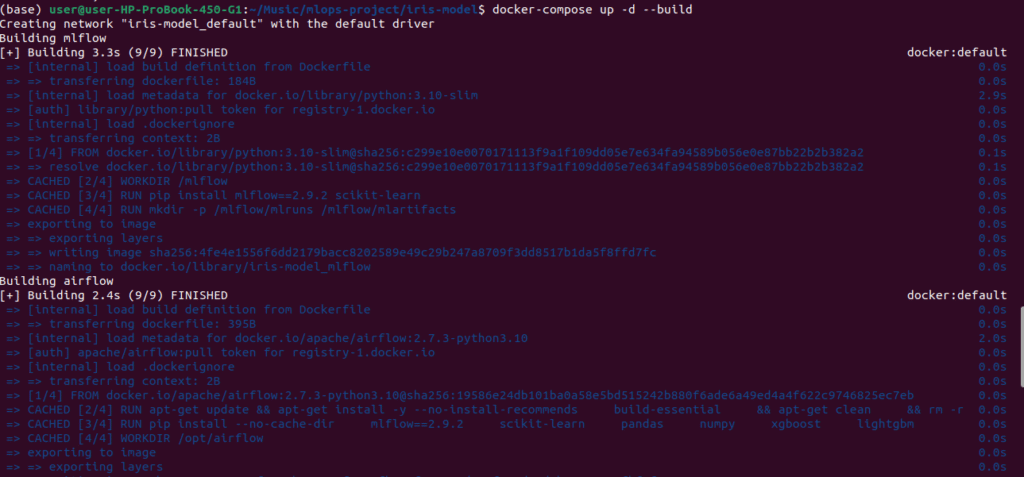
Step 3: Start Everything
One command starts all 4 services:
docker-compose up -d --buildWhat happens:
- Downloads base images (Python, etc.)
- Builds 4 custom containers
- Starts all services
Time: First build takes 5-10 minutes.
Step 4: Wait for Initialization
Services need time to start:
# Wait 2-3 minutes
sleep 180

# Check all are running
docker ps
Expected output:
CONTAINER ID   IMAGE         STATUS         PORTS
abc...         mlflow        Up 2 minutes   0.0.0.0:5000->5000/tcp
def...         airflow       Up 2 minutes   0.0.0.0:8080->8080/tcp
ghi...         backend       Up 2 minutes   0.0.0.0:8000->8000/tcp
jkl...         frontend      Up 2 minutes   0.0.0.0:3000->80/tcp

All should show “Up” status.
Step 5: Access the Services
Open these URLs in your browser:
MLflow – http://localhost:5000

View experiments and models
Airflow – http://localhost:8080
Manage training pipeline
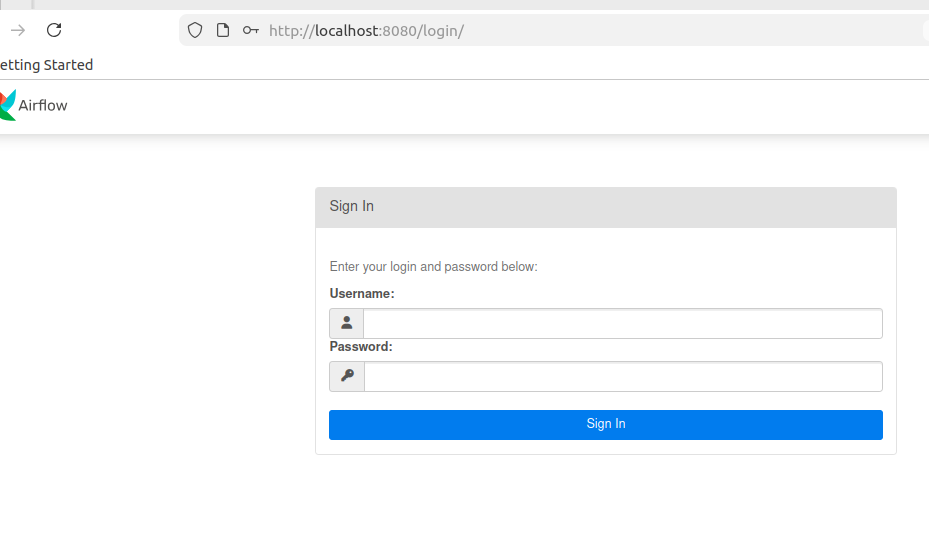
Get Airflow password:
docker exec airflow cat /opt/airflow/standalone_admin_password.txt
Login: username admin, password from above command
FastAPI Docs – http://localhost:8000/docs
Interactive API documentation

Frontend – http://localhost:3000
User interface for predictions
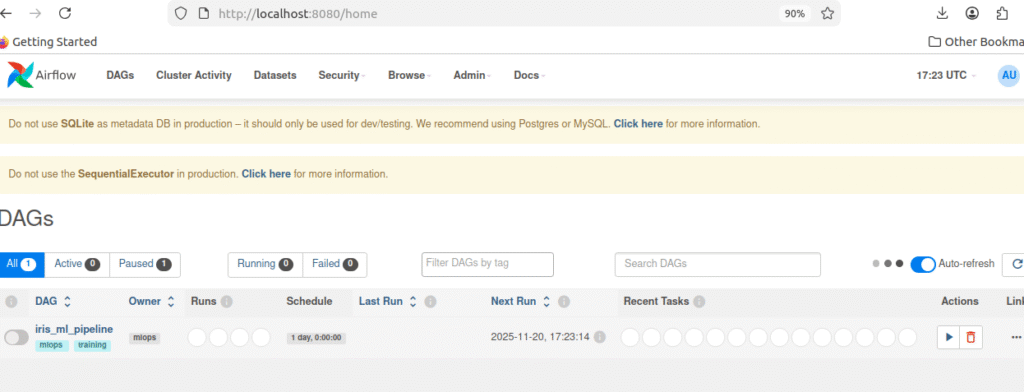
Step 6: Run Training Pipeline
In Airflow UI:
- Open http://localhost:8080
- Login with admin credentials
- Find DAG:
iris_ml_pipeline - Toggle switch to ON
- Click ▶️ button to Trigger DAG
- Watch tasks turn green

Pipeline runs 4 tasks:
load_data– Downloads Iris datasetpreprocess_data– Splits train/testtrain_models– Trains 3 modelsregister_model– Saves best model
Time: 1-2 minutes to complete

Step 7: Verify Results
Check MLflow:
- Open http://localhost:5000
- Click “Experiments”
- Click “iris-classification”
- See 3 runs (one per model)

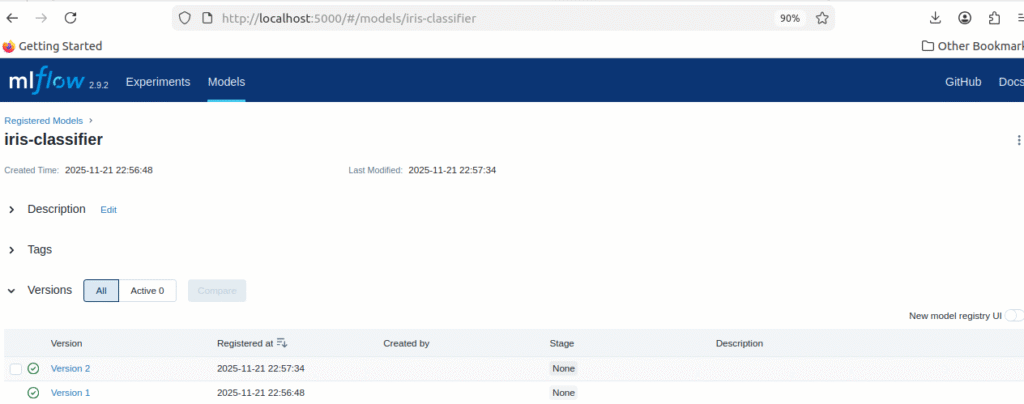
Check Model Registry:
- Click “Models” at top
- See “iris-classifier” with Version 1
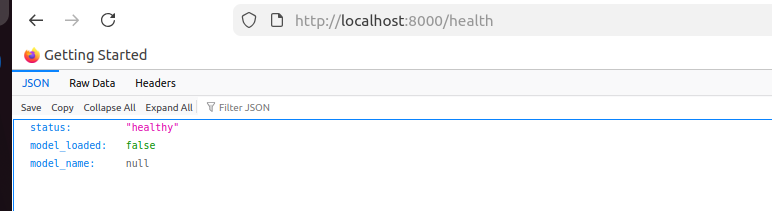
Check Backend:
curl http://localhost:8000/health
Expected response:
{
  "status": "healthy",
  "model_loaded": true,
  "model_name": "random_forest_tuned"
}
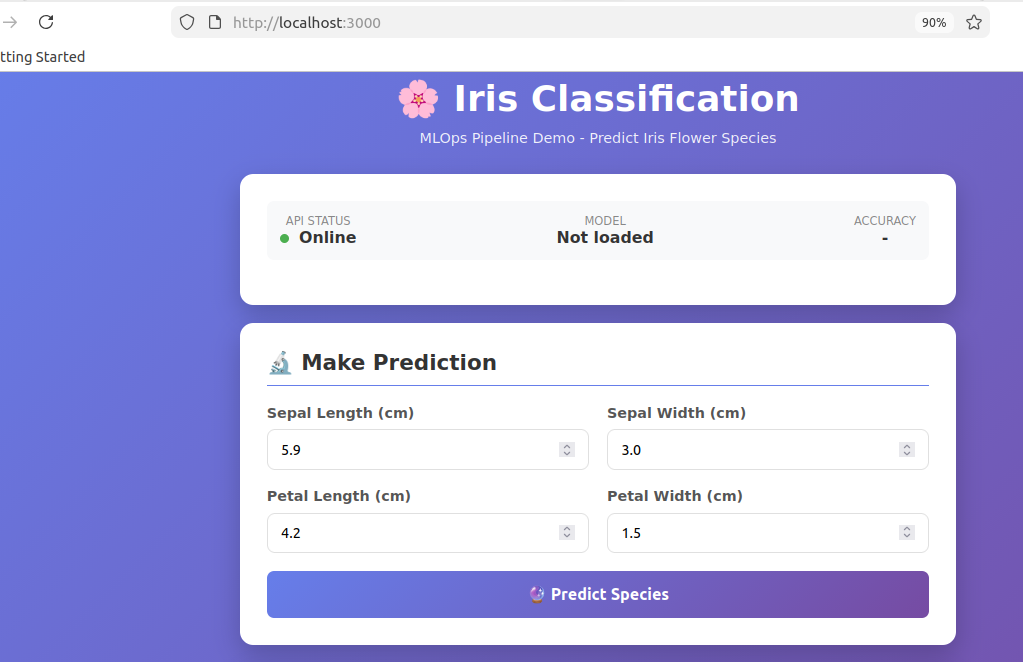
Step 8: Test Predictions
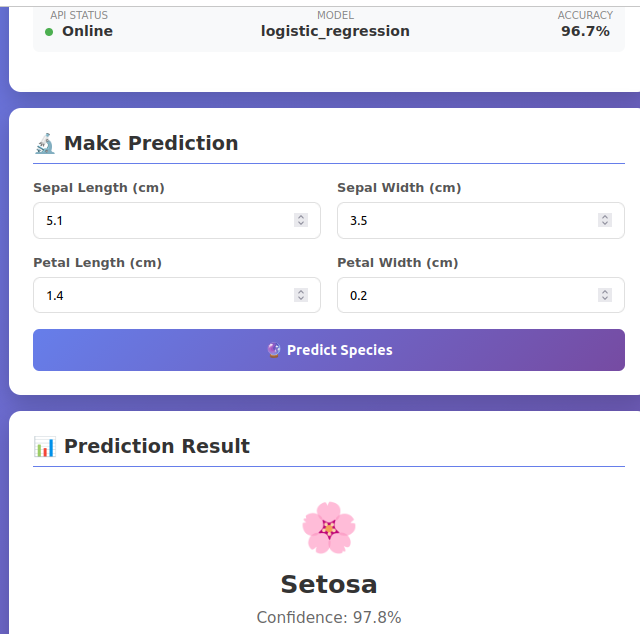
Via Frontend (Easy):
- Open http://localhost:3000
- Enter values:
- Sepal Length: 5.1
- Sepal Width: 3.5
- Petal Length: 1.4
- Petal Width: 0.2
- Click “Predict Species”
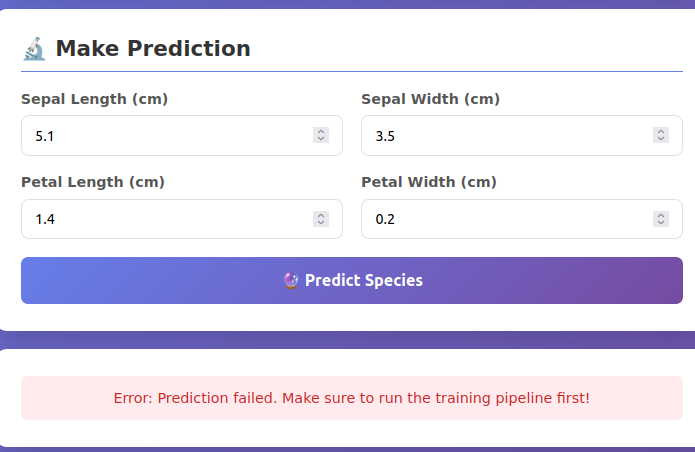
If getting these error just run command
docker-compose restart backend
- check the backend container logs

- Now give the values from frontend again
- See result: setosa with 97.8% confidence
Via API (Advanced):
curl -X POST http://localhost:8000/predict \
  -H "Content-Type: application/json" \
  -d '{
    "sepal_length": 5.1,
    "sepal_width": 3.5,
    "petal_length": 1.4,
    "petal_width": 0.2
  }'
Response:
{
  "prediction": "setosa",
  "prediction_id": 0,
  "confidence": 1.0,
  "model_name": "random_forest_tuned",
  "model_accuracy": 1.0
}
How It Works
The Training Pipeline
When you trigger the Airflow DAG, here’s what happens:
Step 1: Load Data (1 second)
- Downloads Iris dataset (150 flowers, 4 measurements each)
- Saves to CSV file
Step 2: Preprocess (1 second)
- Splits data: 80% training, 20% testing
- Saves as numpy arrays
Step 3: Train Models (30-60 seconds)
Trains 3 different models:
- Random Forest (100 trees)
- Logistic Regression
- Random Forest Tuned (200 trees)
For each model:
- Train on training data
- Test on test data
- Calculate accuracy
- Log everything to MLflow
- Save best model
Results:
- Random Forest: 96.7% accuracy
- Logistic Regression: 93.3% accuracy
- Random Forest Tuned: 100% accuracy ✓ (Winner!)
Step 4: Register Model (5 seconds)
- Saves best model to MLflow Model Registry
- Creates Version 1 (or Version 2, 3, etc. on subsequent runs)
Total Time: ~1-2 minutes
Experiment Tracking
MLflow tracks everything automatically:
What’s logged:
- Model parameters (n_estimators, max_depth, etc.)
- Performance metrics (accuracy, F1 score, etc.)
- Trained model files
- Training date and time
Why it matters:
- Never lose an experiment
- Compare models easily
- Reproduce any result
- Track performance over time
View in MLflow UI:
- See all 3 runs side by side
- Sort by accuracy to find best
- Click any run to see details
- Compare multiple runs
Model Serving
FastAPI loads the trained model and serves predictions:
How it works:
- On startup: Backend loads best model from disk
- User sends request: POST to /predict with flower measurements
- Model predicts: Runs inference (takes ~2ms)
- API responds: Returns prediction with confidence
Endpoints:
GET /health– Check if model is loadedPOST /predict– Make predictionGET /model-info– Get model details
Performance:
- Average response time: <50ms
- Can handle 200+ requests/second
Model Versioning
Every time the pipeline runs, a new model version is created:
Timeline:
Day 1: Run pipeline → Version 1 created (96.7% accuracy)
Day 2: Run pipeline → Version 2 created (100% accuracy)
Day 3: Run pipeline → Version 3 created (98.3% accuracy)
Benefits:
- Track model evolution
- Rollback if new model is worse
- Compare versions
- Know which model is in production
View versions:
MLflow → Models → iris-classifier → See all versions
Results
Model Performance
| Model | Accuracy | Training Time |
|---|---|---|
| Random Forest (100 trees) | 96.7% | 0.8s |
| Logistic Regression | 93.3% | 0.3s |
| Random Forest Tuned | 100% ✓ | 1.2s |
Winner: Random Forest with 200 trees achieved perfect classification.
System Performance
API Speed:
- Average: 47ms per prediction
- Fast enough for real-time use
Training Pipeline:
- Completes in 1-2 minutes
- Runs automatically daily
- No manual work needed
Resource Usage:
- Total RAM: ~1.2GB
- Runs on any laptop
- Minimal CPU usage
Common Issues & Quick Fixes
Issue 1: Container Won’t Start
# Check logs
docker logs airflow

# Restart it
docker-compose restart airflow
Issue 2: Port Already in Use
# Find what's using port 8080
sudo lsof -i :8080

# Kill it
kill -9 [PID]

# Or change port in docker-compose.yaml
Issue 3: Model Not Loading
# Check if model file exists
docker exec airflow ls -la /opt/airflow/models/

# Restart backend
docker-compose restart backend

# Verify
curl http://localhost:8000/health
Issue 4: Permission Denied
# Fix permissions
chmod -R 777 models/ data/ mlflow/

# Restart services
docker-compose restart
Useful Commands
Start/Stop:
# Start all services
docker-compose up -d

# Stop all services
docker-compose down

# Restart specific service
docker-compose restart backend
View Logs:
# All services
docker-compose logs -f

# Specific service
docker logs -f airflow
Check Status:
# See running containers
docker ps

# Check resource usage
docker stats
Test Examples
Try these different flower types:
Setosa (Small):
- Sepal Length: 5.1, Sepal Width: 3.5
- Petal Length: 1.4, Petal Width: 0.2
- Expected: setosa
Versicolor (Medium):
- Sepal Length: 5.9, Sepal Width: 3.0
- Petal Length: 4.2, Petal Width: 1.5
- Expected: versicolor
Virginica (Large):
- Sepal Length: 6.5, Sepal Width: 3.0
- Petal Length: 5.5, Petal Width: 2.0
- Expected: virginica
What We Accomplished
✅ Automated ML Pipeline – Trains models without manual work
✅ Experiment Tracking – Every run logged permanently
✅ Model Versioning – Full history of all models
✅ Production API – Serving predictions in real-time
✅ User Interface – Easy-to-use web application
✅ Containerized Deployment – Runs anywhere Docker runs
Time Investment:
- Setup: 20-25 minutes (first time)
- Daily operation: 0 minutes (fully automated)
Key Learnings
1. Automation Saves Time
- Went from 30 minutes manual work to 0
- Pipeline runs daily without intervention
- Can focus on improving models, not operations
2. Tracking Prevents Lost Work
- Every experiment automatically logged
- Can reproduce any result
- Easy to compare different approaches
3. Docker Solves Environment Issues
- “Works on my machine” problems eliminated
- Same setup everywhere (dev, staging, production)
- Easy for team members to get started
4. Simple Can Be Powerful
- Started with SQLite, file storage
- Works great for development
- Can scale up when needed
5. MLOps is Essential
- Production ML needs more than just models
- Requires automation, tracking, versioning
- Infrastructure is just as important as models
Next Steps
Want to take this further? Here are logical next steps:
Phase 1: Add Monitoring
- Track model performance over time
- Alert when accuracy drops
- Detect data drift
Phase 2: Add CI/CD
- Automated testing on every code change
- Automated deployment to production
- GitHub Actions integration
Phase 3: Deploy to Cloud
- Move from Docker Compose to Kubernetes
- Use cloud storage (S3) instead of files
- Add auto-scaling
Phase 4: Advanced Features
- A/B testing between models
- Real-time retraining
- Model explainability
Conclusion
This project shows that building production ML systems is achievable. You don’t need a huge team or complex infrastructure. Start with:
✓ Automate training
✓ Track experiments
✓ Version models
✓ Serve reliably
These basics get you 80% of the way to production-grade ML.
The key insight: MLOps is about building reliable systems, not just accurate models. This project demonstrates the infrastructure patterns used in real production ML systems.
What’s next? Take this foundation and build on it. Add monitoring, deploy to cloud, scale it up. The patterns you learned here apply to any ML project.
Resources
Documentation:
Learn More:
Tools to Explore:
- Kubernetes for scaling
- GitHub Actions for CI/CD
- Prometheus for monitoring
- Evidently AI for drift detection
Let’s Connect
Found this helpful?
- ⭐ Star the GitHub repo
- 💬 Leave a comment
- 🔗 Connect on LinkedIn
- 📧 Reach out with questions
Questions? Drop a comment – I’ll respond to all!
This article shows a practical, working MLOps system. All code and configurations are production-ready and can be extended for real-world use.