Run Your Own LLM API on Ubuntu Using Docker:
 rjshk013
October 11, 2026
rjshk013
October 11, 2026
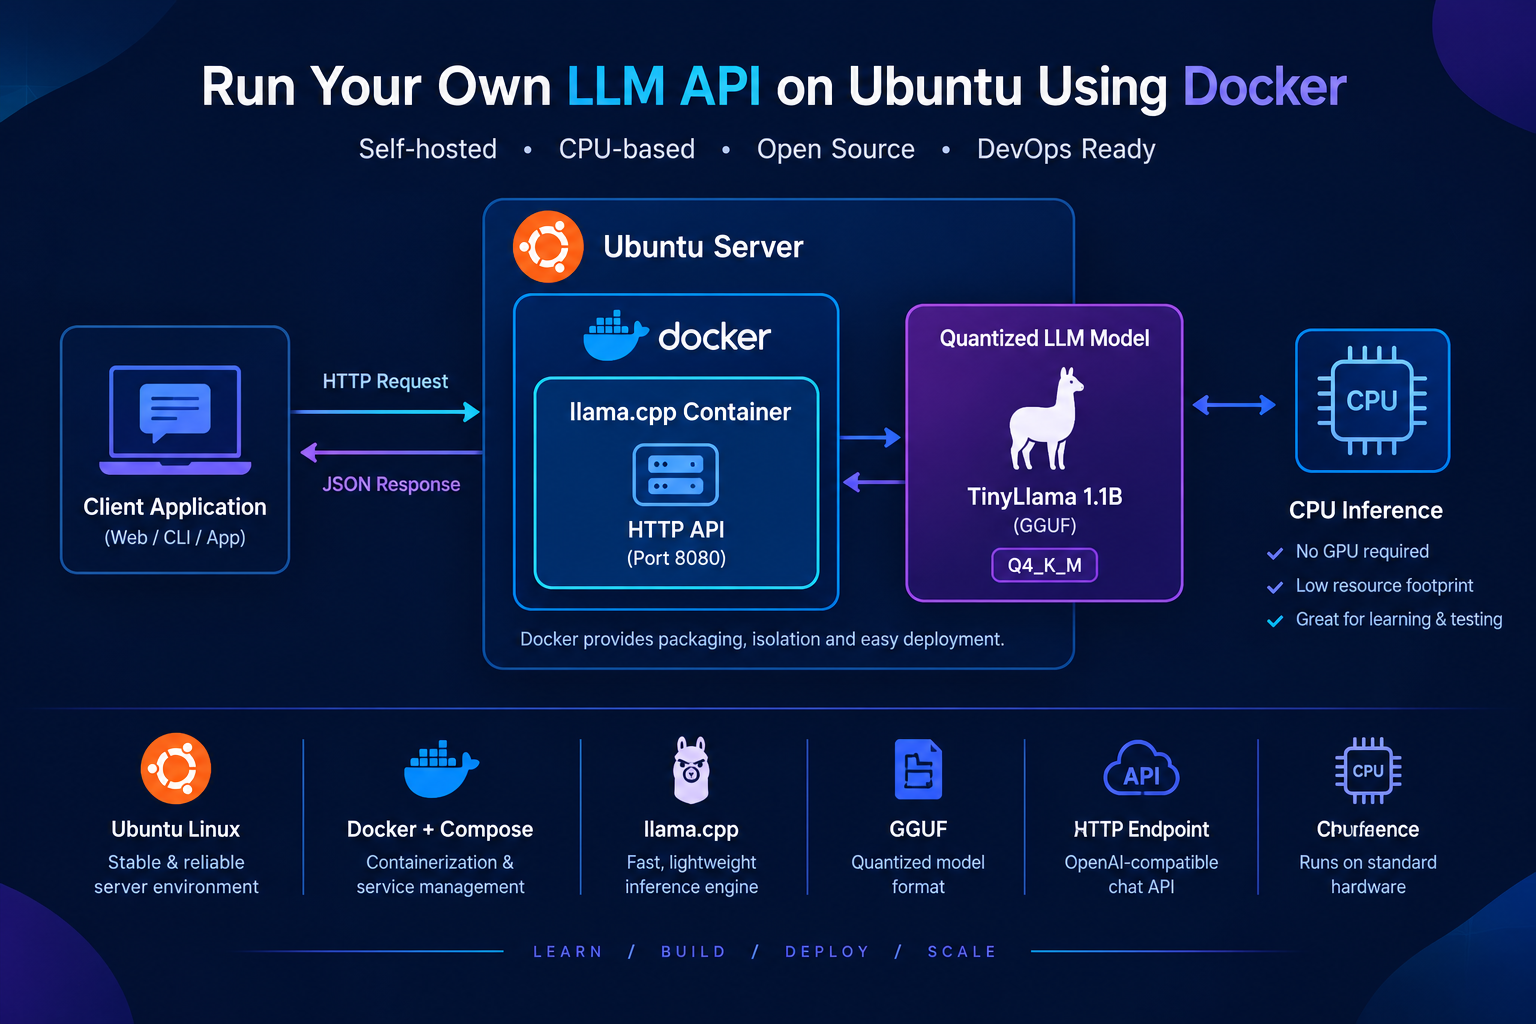
Large Language Models (LLMs) are becoming a core component of modern applications. From chatbots and AI assistants to intelligent automation platforms, developers increasingly need a way to run models and expose them through APIs.
But do you always need expensive GPU infrastructure or a cloud-based AI service to get started?
Not necessarily.
In this hands-on project, we’ll deploy a small, CPU-compatible LLM on an Ubuntu server using Docker and llama.cpp. We’ll expose an HTTP API that can receive prompts and return AI-generated responses.
This is more than an AI experiment. It’s an opportunity to practise Linux administration, containerization, API deployment, resource management, and troubleshooting—the same skills that matter when building AI infrastructure.
What are we building?
We’ll create a lightweight, self-hosted LLM inference service.
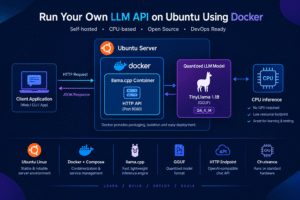
The application will run inside a Docker container, load a quantized language model, and expose an HTTP API that other applications can call.
Our technology stack:
- Operating system: Ubuntu Linux
- Container runtime: Docker
- Container orchestration: Docker Compose
- LLM inference engine:
llama.cpp - Model: TinyLlama 1.1B, in GGUF format
- API: HTTP-based inference endpoint
- Hardware: CPU-based execution
The project is designed for learning and experimentation on a CPU-only machine. Actual performance will depend on the processor, available memory, model quantization, and workload.
Architecture: How the components work together
The request flow is straightforward:
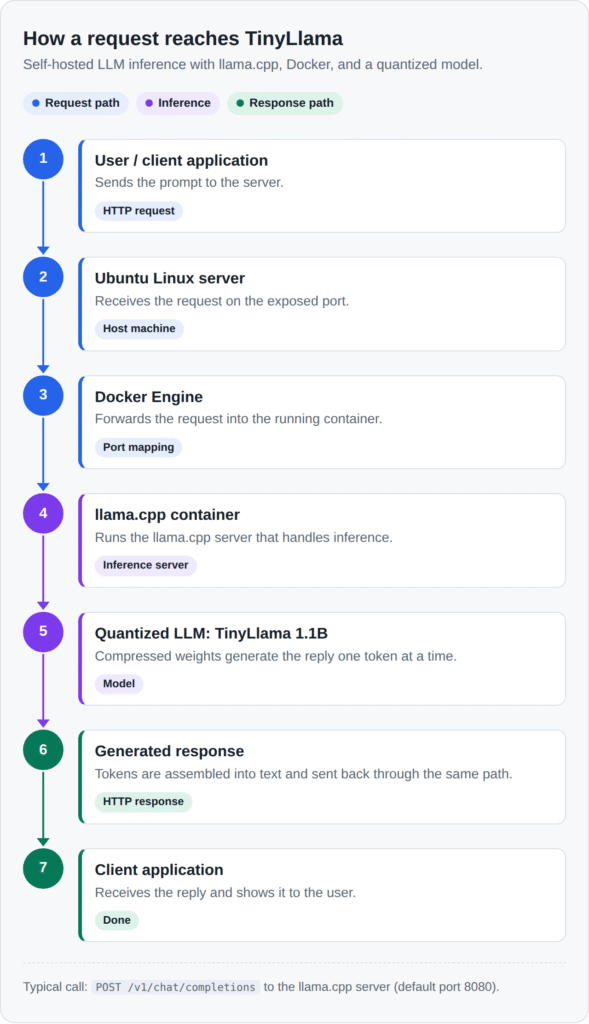
The client sends a prompt to the API. Docker runs the inference service, which loads the model into memory and generates a response using the CPU.
Docker provides packaging and process isolation. The actual inference work is performed by llama.cpp and the loaded model.
Step 1: Prepare the Ubuntu server
Start with an Ubuntu machine that has Docker installed.
Verify that Docker is available:
docker --version
docker compose version
Check your available memory and CPU resources:
free -h
nproc
df -h
A small quantized model can run on a CPU, but the memory requirements depend on the model, context size, and runtime configuration.
Step 2: Create the project directory
We’ll keep the model files and Docker Compose configuration together.
sudo mkdir -p /opt/llama-cpu/models
sudo chown -R "$USER":"$(id -gn)" /opt/llama-cpu

cd /opt/llama-cpu
Create the following project structure:
llama-cpu/
├── docker-compose.yml
└── models/
    └── TinyLlama-1.1B-Chat-v1.0-Q4_K_M.gguf
The model file is not included in the Compose configuration itself. It must be downloaded separately.
Step 3: Download a quantized LLM model
For this lab, we’ll use TinyLlama 1.1B in GGUF format.
GGUF is a model file format supported by llama.cpp. Quantization reduces the memory footprint of model weights, making smaller models more practical to run on CPU-based systems.
Choose a compatible TinyLlama GGUF model and download the Q4_K_M file from a trusted model repository, such as Hugging Face.
Save the downloaded file using this exact path:
/opt/llama-cpu/models/TinyLlama-1.1B-Chat-v1.0-Q4_K_M.gguf
If the repository provides a different filename, rename the downloaded file accordingly:
mv /path/to/downloaded-model.gguf \
   /opt/llama-cpu/models/TinyLlama-1.1B-Chat-v1.0-Q4_K_M.gguf
Verify that the model exists:
ls -lh /opt/llama-cpu/models/Important: A model repository may require authentication or have access restrictions. If a download returns HTTP 401, check the repository’s access requirements and use an accessible GGUF model instead of repeatedly retrying the same URL.
In my case the worked repository like below
wget -c \
"https://huggingface.co/stratalab-org/TinyLlama-1.1B-Chat-v1.0-GGUF/resolve/main/tinyllama-1.1b-chat-v1.0.Q4_K_M.gguf" \
-O TinyLlama-1.1B-Chat-v1.0-Q4_K_M.gguf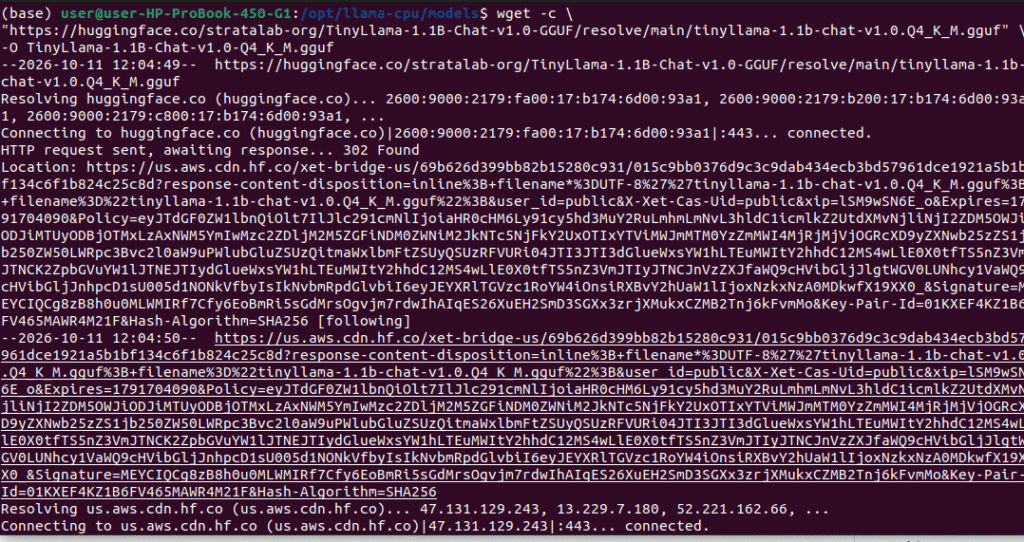
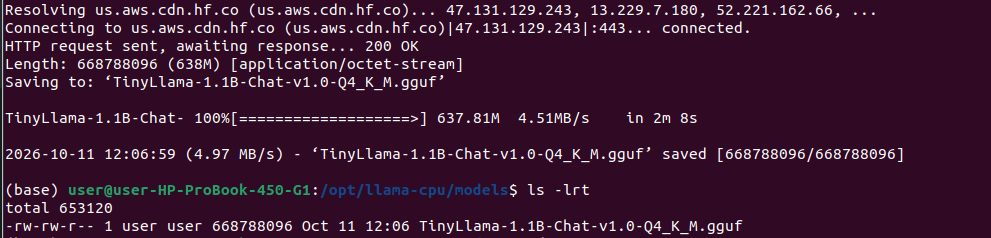
he model is separate from llama.cpp itself.
- llama.cpp provides the inference engine.
- TinyLlama is the model.
- GGUF is the model file format.
- Q4_K_M identifies a particular quantization format.
Step 4: Create the Docker Compose configuration
Create the file:
nano docker-compose.ymlAdd the following configuration:
services:
  llama-api:
    image: ghcr.io/ggml-org/llama.cpp:server
    container_name: llama-cpu-api
    restart: unless-stopped

    ports:
      - "127.0.0.1:8086:8080"

    volumes:
      - ./models:/models:ro

    command:
      - -m
      - /models/TinyLlama-1.1B-Chat-v1.0-Q4_K_M.gguf
      - --host
      - 0.0.0.0
      - --port
      - "8080"
      - -c
      - "2048"
      - -t
      - "4"
Save the file and exit.
Understanding the configuration
| Configuration | Purpose |
|---|---|
image | Uses the official llama.cpp server container image. |
container_name | Gives the container a recognizable name. |
restart | Restarts the container after many unexpected stops or Docker restarts. |
127.0.0.1:8086:8080 | Exposes the API on host port 8086, bound to localhost only. |
./models:/models:ro | Mounts the model directory as read-only inside the container. |
-m | Specifies the model file to load. |
--host 0.0.0.0 | Makes the API listen on all interfaces inside the container. |
--port 8080 | Sets the API’s internal listening port. |
-c 2048 | Sets the context size to 2,048 tokens for this lab. |
-t 4 | Configures four inference threads; adjust based on available CPU resources. |
Ubuntu localhost:8086 → Container port:8080
The API is intentionally bound to 127.0.0.1 on the host. This prevents direct access from other machines through the host’s network interfaces.
If you later want remote access, place the service behind an appropriately secured reverse proxy or API gateway rather than exposing an unauthenticated inference endpoint directly to the internet.
Step 5: Start the LLM API
Before starting the service, validate the Docker Compose configuration:
docker compose configIf the configuration is valid, start the container:
docker compose up -dCheck its status:
docker compose ps
View the startup logs:
docker compose logs -f llama-server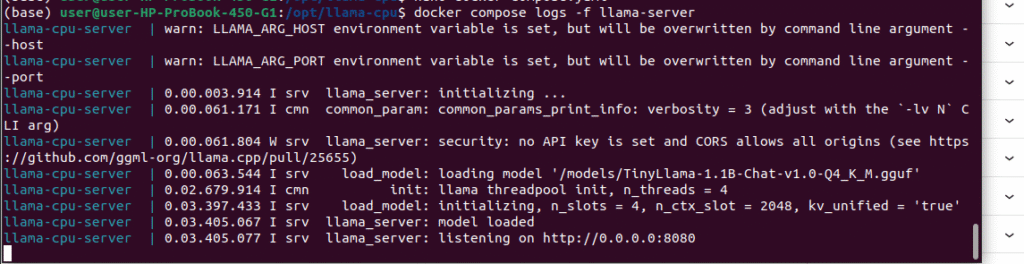
The first startup may take some time while the model is loaded into memory.
To check the container’s resource consumption, run:
docker stats llama-cpu-server
This helps you observe CPU utilization and memory consumption while the model is running.
Step 6: Test the API
Now comes the interesting part: interacting with your locally hosted LLM.
Check the health endpoint
Run:
curl http://127.0.0.1:8086/health
A healthy server should return a successful response. If the endpoint is unavailable, inspect the container logs before proceeding.
Send a prompt to the model
The llama.cpp server supports an OpenAI-compatible chat completions endpoint.
Run:
curl http://127.0.0.1:8086/v1/chat/completions \
  -H "Content-Type: application/json" \
  -d '{
    "model": "local-model",
    "messages": [
      {
        "role": "user",
        "content": "Explain Docker containers in simple terms."
      }
    ],
    "temperature": 0.7,
    "max_tokens": 200
  }'
The response contains a generated answer in JSON format.

What did we achieve?
We have deployed an LLM inference service and accessed it through an HTTP API—without depending on a managed AI inference endpoint.
This endpoint uses llama.cpp’s OpenAI-compatible chat-completions API. You can use it from Python applications and other compatible clients.
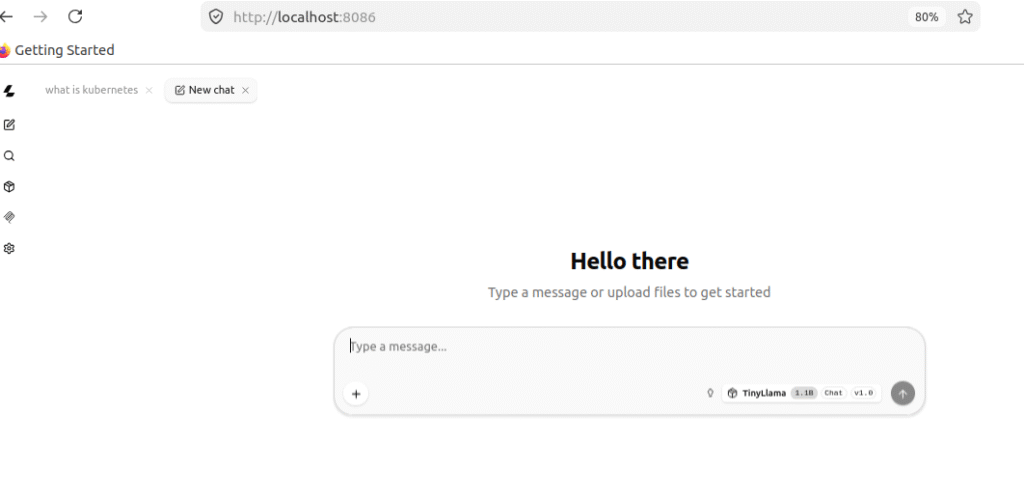
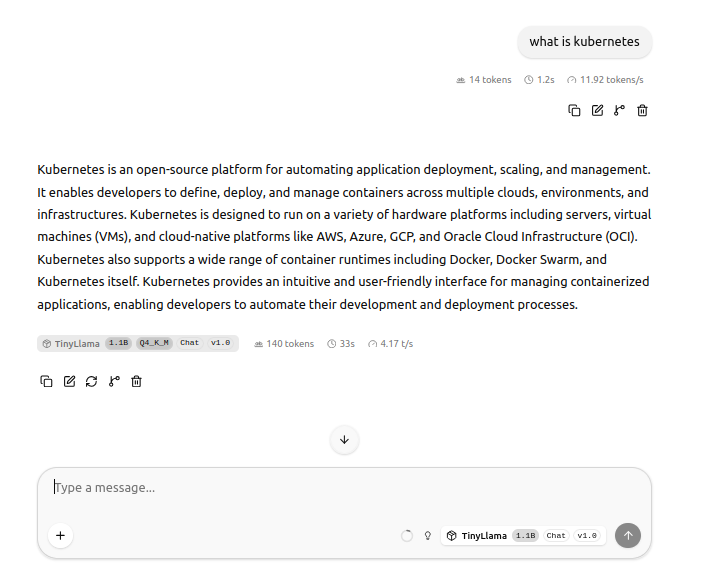
Access the web interface
The llama.cpp server includes a browser-based interface.
On the Ubuntu machine, open:
http://localhost:8086
You should see the llama.cpp interface, assuming the server has started successfully.
You can enter prompts directly into the interface without writing any application code.
Conclusion: Start small, then scale
You don’t need to begin with an expensive GPU cluster to understand how AI inference infrastructure works.
By combining Ubuntu, Docker, llama.cpp, and a small quantized model, you can build a practical LLM API and learn how its runtime behaves under real workloads.
The real value of this project is not simply running an AI model. It’s learning how to package, deploy, expose, monitor, troubleshoot, and eventually scale an AI service.