CLDOP Real-World DevOps Project Series-Part 1
Part 1: MERN E-commerce Application with Docker & AWS S3
🚀 CLDOP DevOps Learning Series
Welcome to the CLDOP Real-World DevOps Project Series! Learn enterprise DevOps practices by building real applications that mirror professional environments.
Introduction
In this first part of the CLDOP DevOps series, you’ll build a production-ready e-commerce application using modern development practices. This isn’t a simple tutorial – you’ll create a real application with the same architecture patterns used by companies like Netflix, Airbnb, and Spotify.
What makes this special: Everything runs on your local Ubuntu machine using Docker containers and AWS Free Tier services, so you can learn enterprise-grade development without any costs.
What You’ll Build
Complete E-commerce Platform
- User Management – Registration, login, dashboard with session management
- Product Catalog – Browse products with professional image hosting
- Order Processing – Complete order workflow with cash-on-delivery
- Admin Panel – User management, order tracking, analytics dashboard
- Email System – Automated order confirmations via message queue
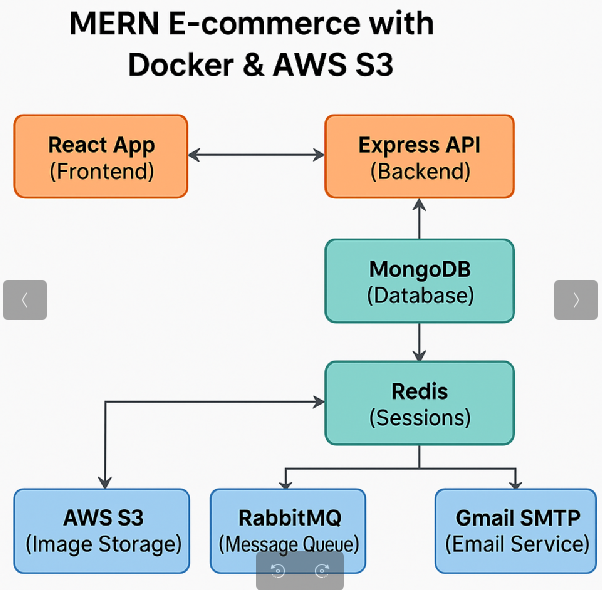
Enterprise Architecture
Key Learning Outcomes
- Containerization with Docker and Docker Compose
- Cloud Integration with AWS S3 for scalable storage
- Database Design with MongoDB and proper data modeling
- Caching Strategies using Redis for performance optimization
- Message Queues with RabbitMQ for reliable async processing
- Full-Stack Development with React, Node.js, and Express
Technology Stack
Core Application
- Frontend: React 18.x with React Router and Bootstrap
- Backend: Node.js 18.x with Express.js framework
- Database: MongoDB 6.0 with Mongoose ODM
- Authentication: JWT tokens with bcrypt password hashing
Infrastructure & DevOps
- Containerization: Docker and Docker Compose
- Cloud Storage: AWS S3 (Free Tier – 5GB storage)
- Caching: Redis for session management and data caching
- Message Queue: RabbitMQ for email processing
- Email Service: Gmail SMTP (free tier)
Why These Technologies
- Docker: Ensures consistent environments across development and production
- AWS S3: Industry standard for scalable, reliable file storage
- Redis: Essential for high-performance applications requiring fast data access
- RabbitMQ: Critical for building resilient, scalable systems with async processing
- MongoDB: Flexible schema perfect for evolving e-commerce requirements
Prerequisites
Before starting, ensure you have:
System Requirements
- Ubuntu machine (18.04 or later)
- 8GB RAM minimum (for running multiple containers)
- 10GB free disk space
- Stable internet connection
- Docker,Docker compose& git installed
Account Setup
- AWS Account – Sign up at aws.amazon.com (free tier available)
- Gmail Account – For email notifications (free)
- GitHub Account – For code repository (free)
Quick Start Guide
Step 1: Clone the Repository
# Clone the complete project
git clone https://github.com/rjshk013/cldop-projecthub.git
cd ecommerce-app
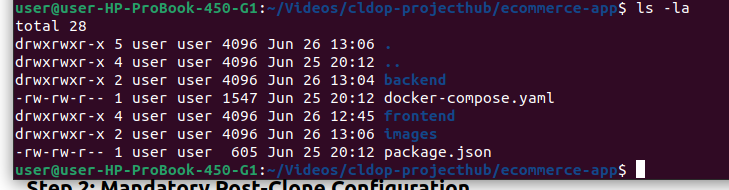
# Check project structure
ls -la
# You should see: backend/, frontend/, docker-compose.yaml, images/
Step 2: Mandatory Post-Clone Configuration
⚠️ IMPORTANT: The cloned repository contains template configurations. You MUST complete these steps to make it work on your machine:
Required Actions Checklist:
- [ ] Create your own AWS S3 bucket
- [ ] Upload product images to your S3 bucket
- [ ] Create AWS IAM user and get credentials
- [ ] Set up Gmail app password
- [ ] Generate JWT secret
- [ ] Update .env file with your values
- [ ] Update S3 URLs in backend code
- [ ] Build and test the application
Detailed Configuration Steps
Step 3: AWS S3 Setup & Configuration
Create Your S3 Bucket
- Login to AWS Console → Navigate to S3 service
- Click “Create bucket”
- Bucket name:
your-name-ecommerce-store(must be globally unique)- Example:
john-ecommerce-store-2025 - Note: Replace
your-namewith your actual name or unique identifier
- Example:
- Region: Select
us-east-1(US East Virginia) - Object Ownership: ACLs disabled (recommended)
- Block Public Access: UNCHECK all boxes (we need public read access)
- Bucket Versioning: Disable
- Default encryption: Disable for now
- Click “Create bucket”
Configure Bucket Permissions
- Go to your bucket → Click on bucket name
- Click “Permissions” tab
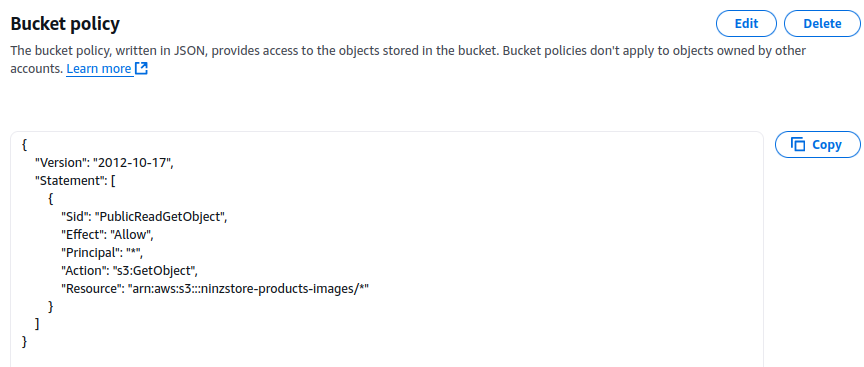
- Scroll to “Bucket policy” → Click “Edit”
- Paste this policy (replace
YOUR-BUCKET-NAMEwith your actual bucket name):
{
    "Version": "2012-10-17",
    "Statement": [
        {
            "Sid": "PublicReadGetObject",
            "Effect": "Allow",
            "Principal": "*",
            "Action": "s3:GetObject",
            "Resource": "arn:aws:s3:::YOUR-BUCKET-NAME/*"
        }
    ]
}
Example: If your bucket name is john-ecommerce-store-2025-+, the resource line becomes:
"Resource": "arn:aws:s3:::john-ecommerce-store-2025/*"
- Click “Save changes”
📌 Note: In this development/demo setup, we’re configuring the S3 bucket to allow public access to image files so they can be directly accessed via URL.
🔐 In a production environment, public access must be disabled. Instead, you should serve private S3 objects securely using:
- Pre-signed URLs (short-lived, signed links)
- or CloudFront with signed URLs/policies for CDN-based delivery
This ensures secure access and protects your content from unauthorized use.
Create Products Folder
- Inside your bucket, click “Create folder”
- Folder name:
products - Click “Create folder”
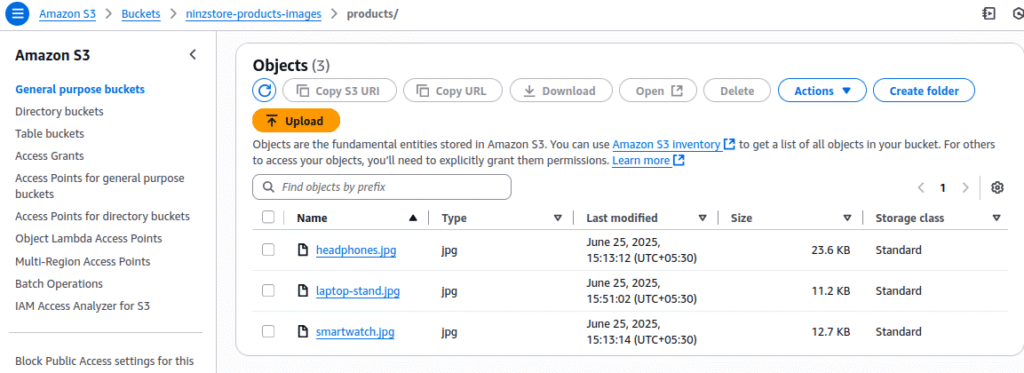
Upload Product Images from Repository
The repository includes product images in the images/ folder. Upload these to your S3 bucket:
- Check repository images:
# Verify images exist in your cloned repo
ls -la images/
# Should show: headphones.jpg, smartwatch.jpg, laptop-stand.jpg
- Upload to S3 via AWS Console:
- Go to your bucket →
productsfolder - Click “Upload” → “Add files”
- Navigate to your local
images/folder - Select all 3 images:
headphones.jpg,smartwatch.jpg,laptop-stand.jpg - Click “Upload”
- Go to your bucket →
- Alternative: Upload via AWS CLI (if you have AWS CLI installed):
# Upload all images at once
aws s3 cp images/headphones.jpg s3://YOUR-BUCKET-NAME/products/
aws s3 cp images/smartwatch.jpg s3://YOUR-BUCKET-NAME/products/
aws s3 cp images/laptop-stand.jpg s3://YOUR-BUCKET-NAME/products/
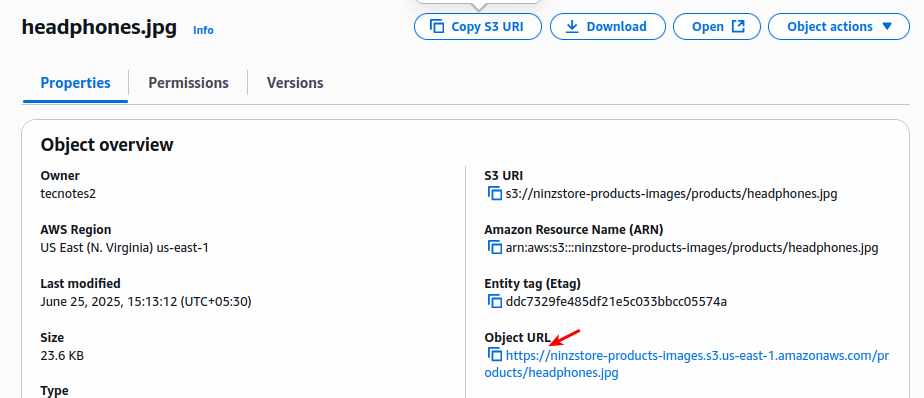
- Get your S3 image URLs (you’ll need these in Step 6):
https://YOUR-BUCKET-NAME.s3.us-east-1.amazonaws.com/products/headphones.jpghttps://YOUR-BUCKET-NAME.s3.us-east-1.amazonaws.com/products/smartwatch.jpghttps://YOUR-BUCKET-NAME.s3.us-east-1.amazonaws.com/products/laptop-stand.jpg
Example: If your bucket is john-ecommerce-store-2024:
https://john-ecommerce-store-2024.s3.us-east-1.amazonaws.com/products/headphones.jpg
Create IAM User for API Access
- AWS Console → IAM → Users → Create user
- User name:
ecommerce-app-user - Next → Attach policies directly
- Search and select:
AmazonS3FullAccess - Next → Create user
- Click on the user → Security credentials tab
- Click “Create access key” → Application running outside AWS → Next
- Copy and save:
- Access key ID:
AKIA... - Secret access key:
wJal...(only shown once!)
- Access key ID:
📌 Note: The steps given are suitable for development or demo purposes.
In production environments, you must follow the principle of least privilege and restrict permissions to only required S3 actions (e.g.,s3:PutObject,s3:GetObject,s3:ListBucketon specific buckets), rather than usingAmazonS3FullAccess.
Step 4: Gmail SMTP Setup
Enable Gmail App Password
- Go to Gmail → Account settings → Security
- Enable 2-factor authentication (required for app passwords)
- Go to Security → 2-Step Verification → App passwords
- Select app: Mail
- Select device: Other → Type: “E-commerce App”
- Generate → Copy the 16-character password (example:
abcd efgh ijkl mnop) - Remove spaces:
abcdefghijklmnop
Reference link to do it quickly: https://support.google.com/mail/thread/205453566/how-to-generate-an-app-password?hl=en
Step 5: Environment Configuration
Generate JWT Secret
# Generate secure JWT secret
openssl rand -base64 64
# Copy the output (64-character string)
Update Environment File
The repository contains a template .env file. You need to update it with your real values:
# Navigate to backend directory
cd backend

# Edit the .env file
mv .env.sample .env
nano .env
# Or use any text editor: code, vim  etc.
Replace ALL placeholder values in backend/.env:
# Database (KEEP AS IS)
MONGODB_URI=mongodb://root:password@mongo:27017/simple_ecommerce?authSource=admin

# Cache (KEEP AS IS)
REDIS_HOST=redis
REDIS_PORT=6379

# Message Queue (KEEP AS IS)
RABBITMQ_URL=amqp://admin:password@rabbitmq:5672

# Security - REPLACE WITH YOUR GENERATED SECRET
JWT_SECRET=paste_your_64_character_jwt_secret_here

# AWS S3 - REPLACE WITH YOUR VALUES
AWS_ACCESS_KEY_ID=paste_your_aws_access_key_id_here
AWS_SECRET_ACCESS_KEY=paste_your_aws_secret_access_key_here
AWS_REGION=us-east-1
S3_BUCKET_NAME=paste_your_actual_bucket_name_here

# Email - REPLACE WITH YOUR VALUES
EMAIL_USER=paste_your_email@gmail.com
EMAIL_PASSWORD=paste_your_16_character_app_password_here

# Application (KEEP AS IS)
PORT=5000
NODE_ENV=development

#s3bucket url for images
HEADPHONES_IMAGE_URL=your_s3bucket_locationfor_headphoneimage
SMARTWATCH_IMAGE_URL=your_s3bucket_locationfor_smartwatchimage
LAPTOPSTAND_IMAGE_URL=your_s3bucket_location_laptopstandimage
Post-Clone Configuration Summary
✅ Required Actions Checklist
After cloning the repository, you MUST complete these actions:
AWS Configuration
- [ ] Create unique S3 bucket (e.g.,
yourname-ecommerce-store-2025) - [ ] Upload 3 product images from
images/folder to S3 - [ ] Create IAM user with S3 permissions
- [ ] Copy Access Key ID and Secret Access Key
Gmail Configuration
- [ ] Enable 2-factor authentication on Gmail
- [ ] Generate 16-character app password
- [ ] Remove spaces from app password
Application Configuration
- [ ] Generate JWT secret using Node.js command
- [ ] Update
backend/.envwith all your real values - [ ] Verify no placeholder values remain
Testing
- [ ] Test S3 image URLs in browser
- [ ] Verify
.envfile has no “your_” or “placeholder” text - [ ] Build and run application
- [ ] Test complete user and admin flows
⚠️ Common Mistakes to Avoid:
- Don’t leave any placeholder values in
.envfile - Don’t forget to update S3 URLs in BOTH locations in
server.js - Don’t use your regular Gmail password (use app password)
- Don’t skip creating the
products/folder in S3
Step 7: Verify Configuration
Before building, let’s verify everything is configured correctly:
Test S3 Image URLs
Open these URLs in your browser to verify images are accessible:
https://YOUR-BUCKET-NAME.s3.us-east-1.amazonaws.com/products/headphones.jpghttps://YOUR-BUCKET-NAME.s3.us-east-1.amazonaws.com/products/smartwatch.jpghttps://YOUR-BUCKET-NAME.s3.us-east-1.amazonaws.com/products/laptop-stand.jpg
You should see the product images load successfully.
Verify Environment File
# Check your .env file has real values (no placeholders)
cat backend/.env

# Ensure no "your_" or "placeholder" text remains
grep -i "your_\|placeholder" backend/.env
# This should return nothing if properly configured
🧱 Docker Compose Setup Breakdown
version: '3.8'

services:
  # MongoDB Database
  mongo:
    image: mongo:6.0
    container_name: ecommerce_mongo
    restart: always
    environment:
      MONGO_INITDB_ROOT_USERNAME: root
      MONGO_INITDB_ROOT_PASSWORD: password
    ports:
      - "27017:27017"
    volumes:
      - mongo_data:/data/db
    networks:
      - ecommerce_network

  # Redis Cache
  redis:
    image: redis:7-alpine
    container_name: ecommerce_redis
    restart: always
    ports:
      - "6379:6379"
    volumes:
      - redis_data:/data
    networks:
      - ecommerce_network

  # RabbitMQ Message Queue
  rabbitmq:
    image: rabbitmq:3-management
    container_name: ecommerce_rabbitmq
    restart: always
    environment:
      RABBITMQ_DEFAULT_USER: admin
      RABBITMQ_DEFAULT_PASS: password
    ports:
      - "5672:5672"
      - "15672:15672"  # Management UI
    volumes:
      - rabbitmq_data:/var/lib/rabbitmq
    networks:
      - ecommerce_network

  # Backend API
  backend:
    build: ./backend
    container_name: ecommerce_backend
    restart: always
    env_file:
    - ./backend/.env
    ports:
      - "5000:5000"
    depends_on:
      - mongo
      - redis
      - rabbitmq
    networks:
      - ecommerce_network

  # Frontend React App
  frontend:
    build: ./frontend
    container_name: ecommerce_frontend
    restart: always
    ports:
      - "3000:80"
    depends_on:
      - backend
    networks:
      - ecommerce_network

volumes:
  mongo_data:
  redis_data:
  rabbitmq_data:

networks:
  ecommerce_network:
    driver: bridge
🛢️ MongoDB (Database)
  mongo:
    image: mongo:6.0
- Runs MongoDB as the primary database for product, user, and order data.
✅ Uses a volume (mongo_data) to persist data even if the container restarts
✅ Exposes port 27017 to allow local access (dev only)
✅ Configured with default root user and password (insecure for prod)
⚡ Redis (Cache)
  redis:
    image: redis:7-alpine
- In-memory cache for fast access to user sessions, OTPs, etc.
✅ Very lightweight (alpine)
✅ Exposes 6379 for Redis access
✅ Uses redis_data volume to retain state if needed
🛢️ MongoDB (Database)
📩 RabbitMQ (Message Queue)
  rabbitmq:
    image: rabbitmq:3-management
- Used for decoupled communication, like sending email/SMS order confirmations.
✅ Exposes:
5672for internal messaging (backend ↔ RabbitMQ)15672for web UI to view/manage queues
✅ Secured withadmin/password(change for prod)
⚙️ Backend API (Node.js + Express)
  backend:
    build: ./backend
- Runs the Node.js/Express backend
✅ Reads environment variables from .env
✅ Depends on mongo, redis, and rabbitmq
✅ Listens on 5000:5000
💻 Frontend (React App)
  frontend:
    build: ./frontend
- React app for user interface (products, cart, login, etc.)
✅ Built from source (./frontend folder)
✅ Served via NGINX or HTTP on port 3000 → mapped to internal port 80
✅ Depends on backend being ready
🧱 Volumes
volumes:
  mongo_data:
  redis_data:
  rabbitmq_data:
Ensures persistent storage for stateful services
🌐 Network
networks:
  ecommerce_network:
    driver: bridge
All services communicate within this isolated network
Step 8: Build and Deploy
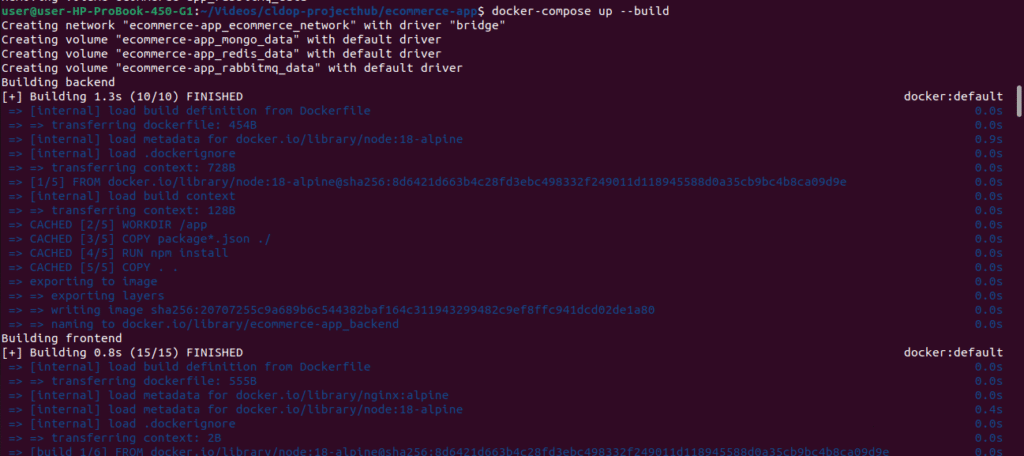
🧪 Initial Docker Compose Setup & Verification
Before running your application in detached mode, it’s a best practice to build and test everything interactively to check for any errors in your containers:
✅ This command:
- Displays real-time logs to help you identify and fix issues during the startup phase
- Builds all images from your Dockerfiles
- Starts containers in the foreground
# Return to project root
cd ..

# Build all services
docker-compose up --build

# Check all containers are running
docker-compose ps
# Should show all 5 containers: mongo, redis, rabbitmq, backend, frontend
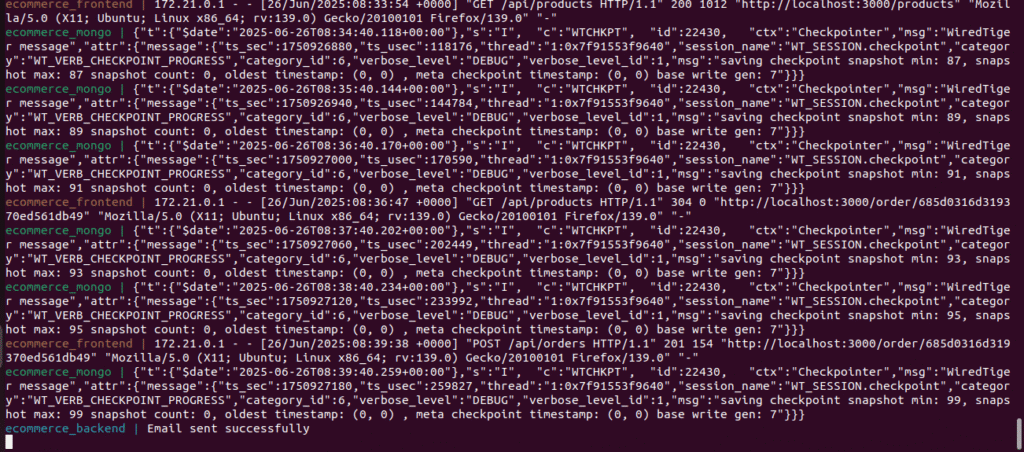
# View logs to verify startup
docker-compose logs backend | tail -20
# Should show: "Server running on port 5000" and "Database seeded"
Once everything looks good and you’re confident the application is working, you can stop the containers (Ctrl+C) and restart them in the background using:
docker-compose up -d🚀 This runs your app in detached mode, freeing your terminal while the services continue to run in the background.
Step 9: Testing the Application
Initial Verification
# Test backend API
curl http://localhost:5000/api/products
# Should return JSON with 3 products and your S3 image URLs
Test Complete User Flow
- Open Frontend: http://localhost:3000
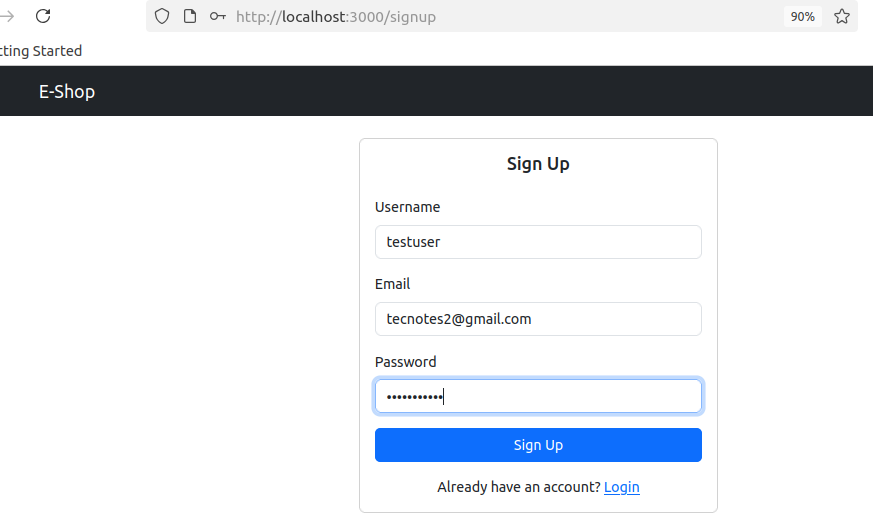
- Register New User:
- Click “Sign Up”
- Username:
testuser - Email:
test@example.com(give a real gmail id so will get email confirmation after order) - Password:
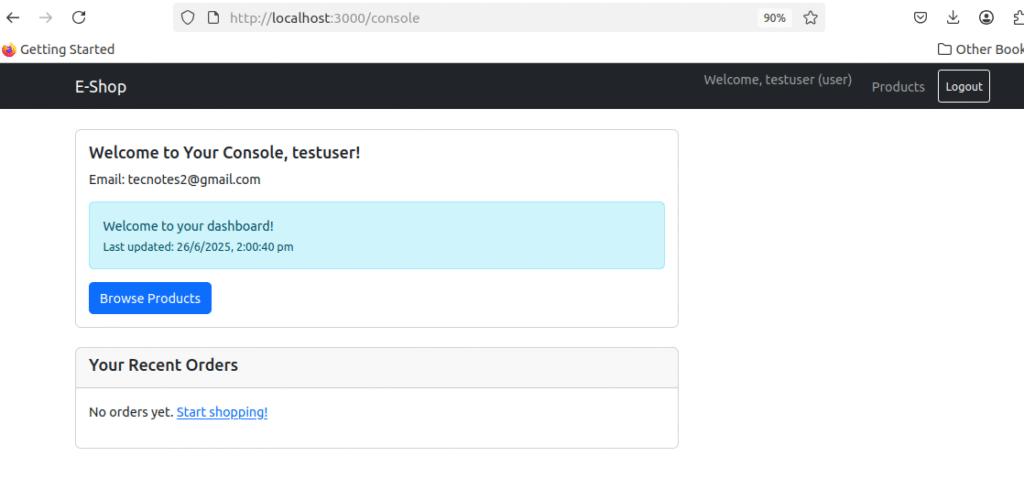
password123 - Should redirect to dashboard after registration
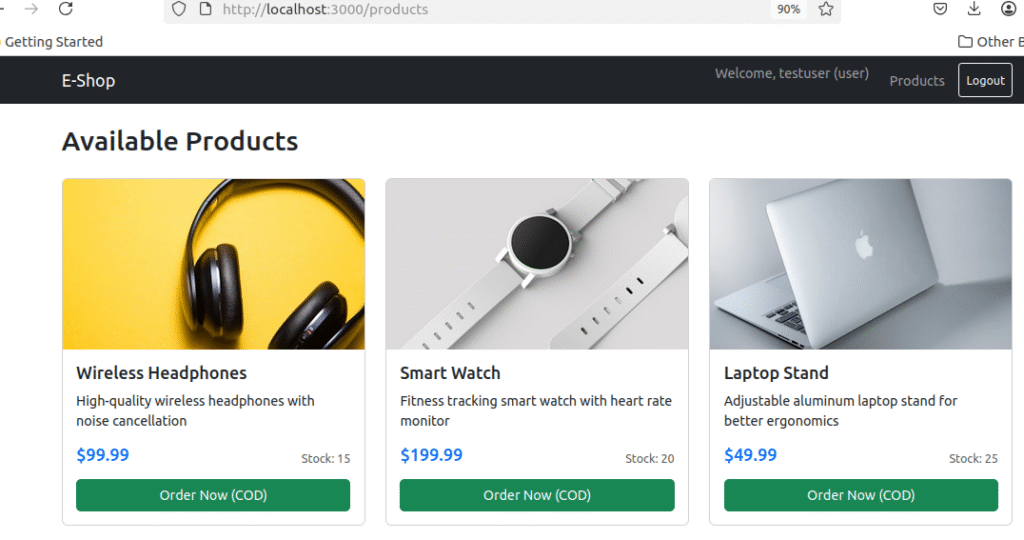
- Browse Products:
- Click “Products” in navigation
- Should see 3 products with your S3 images loading
- Click “Order Now” on any product
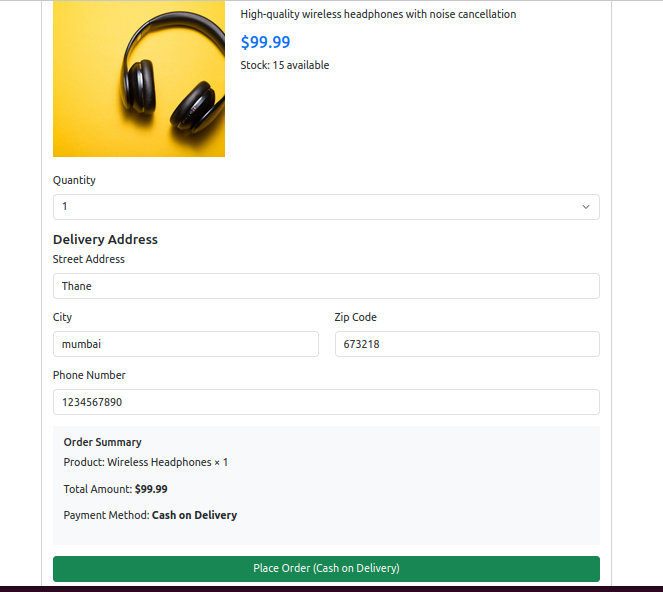
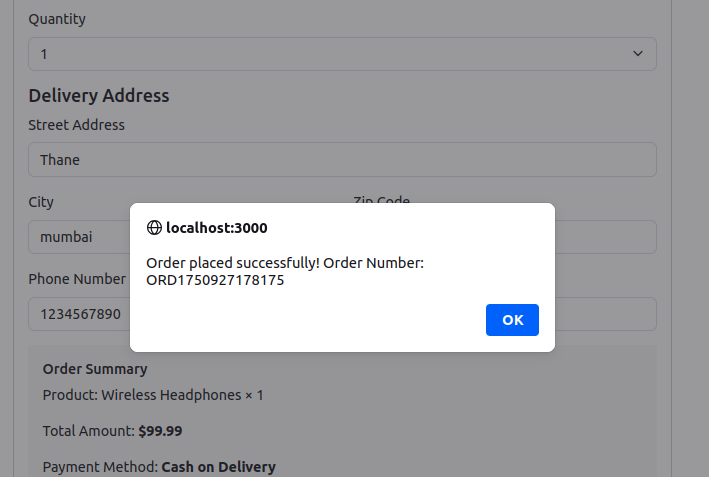
- Place Order:
- Fill delivery address
- Click “Place Order (Cash on Delivery)”
- Should see success message with order number
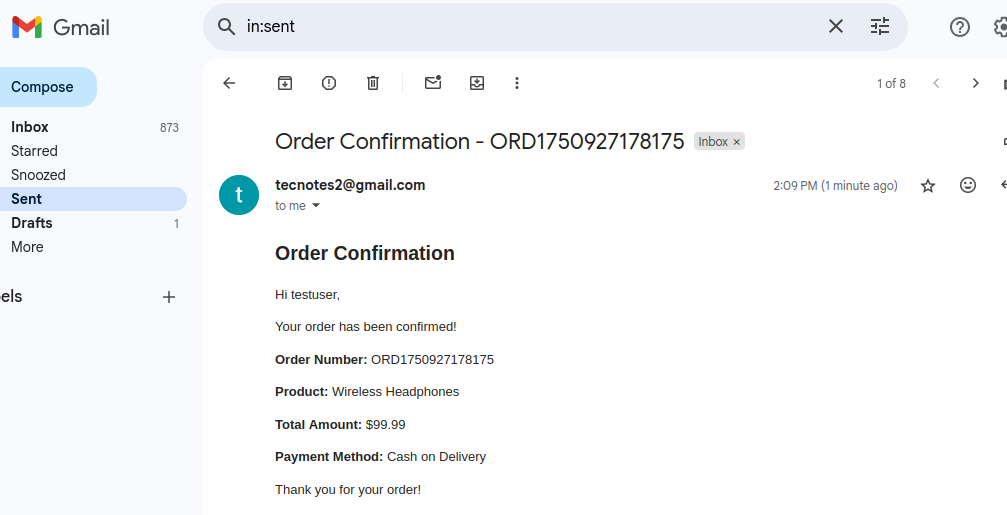
- Check your Gmail for order confirmation email
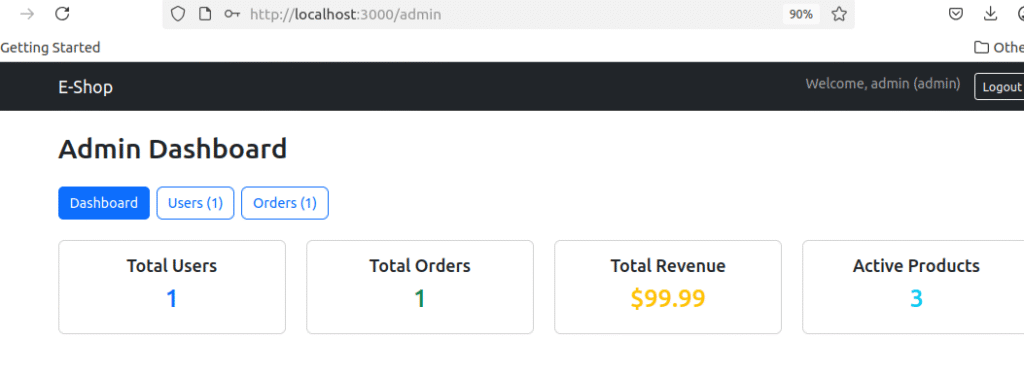
Test Admin Panel
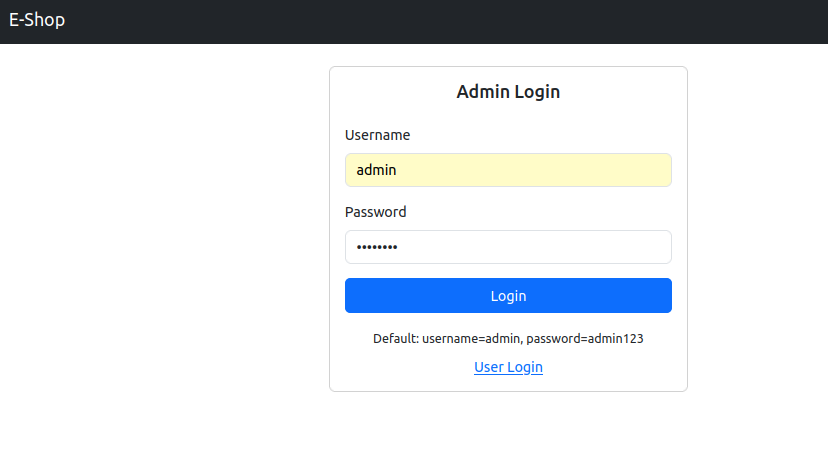
- Access Admin: http://localhost:3000/admin-login
- Login Credentials:
- Username:
admin - Password:
admin123
- Username:
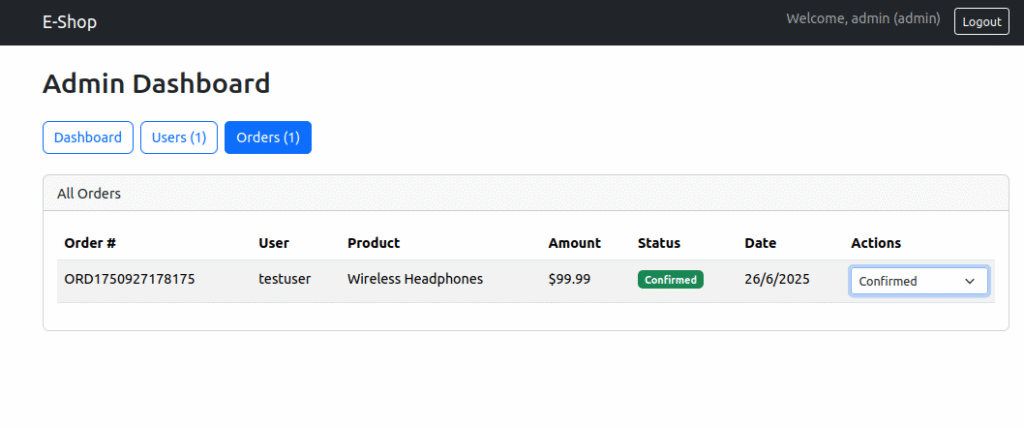
- Verify Admin Functions:
- Dashboard shows user/order statistics
- Users tab shows registered users
- Orders tab shows placed orders
- Try updating an order status
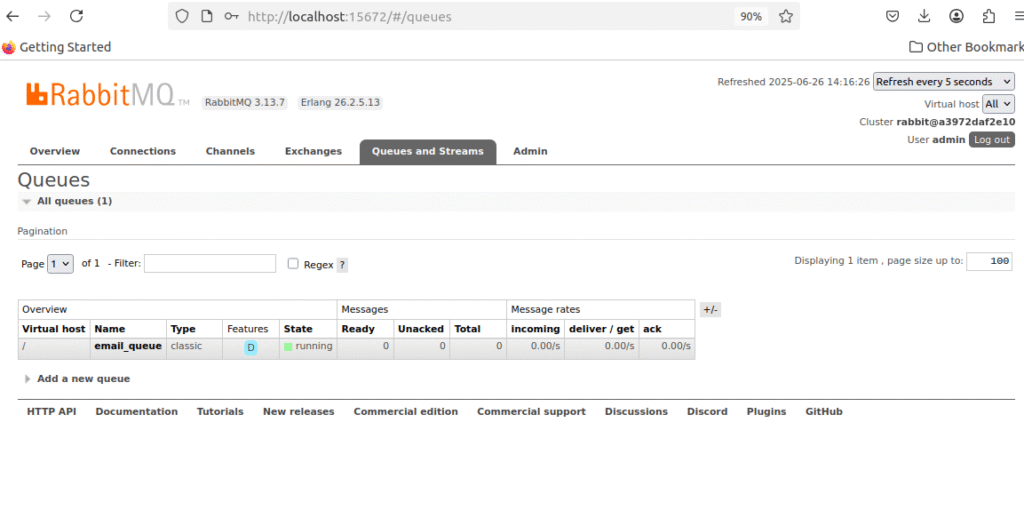
Test RabbitMQ Management
- Access RabbitMQ UI: http://localhost:15672
- Login: admin/password
- Check Queues: Should see
email_queue - Verify Message Processing: Queue should be empty (messages processed)
Step 10: Troubleshooting
If Images Don’t Load
# Check S3 bucket policy
aws s3api get-bucket-policy --bucket YOUR-BUCKET-NAME

# Test image URL directly
curl -I https://YOUR-BUCKET-NAME.s3.us-east-1.amazonaws.com/products/headphones.jpg
# Should return: HTTP/1.1 200 OK
If Backend Won’t Start
# Check backend logs
docker-compose logs backend

# Common issues:
# 1. Invalid S3 credentials - verify AWS keys
# 2. Wrong bucket name - check .env file
# 3. Gmail authentication - verify app password
If Email Not Working
# Check RabbitMQ logs
docker-compose logs rabbitmq

# Check Gmail settings:
# 1. 2-factor authentication enabled
# 2. App password generated correctly
# 3. No spaces in password
Reset Everything
# If you need to start over
docker-compose down -v
docker system prune -f
docker-compose up --build
Best Practices Implemented
Security
- Password hashing with bcrypt
- JWT token authentication
- Environment variable management
- Input validation and sanitization
Performance
- Redis caching for frequently accessed data
- Database indexing for optimized queries
- Image optimization with S3 storage
- Container resource optimization
Scalability
- Microservices architecture with containers
- Message queue for async processing
- Cloud storage for static assets
- Stateless application design
Reliability
- Auto-restart policies for containers
- Health checks for service monitoring
- Error handling and logging
- Database connection management
Troubleshooting Common Issues
Container Issues
# Check container logs
docker-compose logs [service-name]

# Restart specific service
docker-compose restart [service-name]

# Rebuild containers
docker-compose down && docker-compose up --build
Database Connection
# Check MongoDB connection
docker exec -it ecommerce_mongo mongo -u root -p password

# Reset database
docker-compose down -v && docker-compose up --build
Email Configuration
- Ensure 2-factor authentication is enabled on Gmail
- Generate app-specific password, not regular password
- Verify environment variables are set correctly
What You’ve Accomplished
Congratulations! You’ve successfully built a production-ready e-commerce application with:
✅ Modern Development Stack – MERN with professional tools
✅ Container Orchestration – Docker Compose managing multiple services
✅ Cloud Integration – AWS S3 for scalable storage
✅ Performance Optimization – Redis caching and efficient architecture
✅ Async Processing – RabbitMQ for reliable email delivery
✅ Enterprise Patterns – Same patterns used by major tech companies
🔜 What’s Coming Next
In the upcoming parts of this DevOps project series, we’ll take this MERN e-commerce application from local development to a production-ready deployment on AWS, before automating the delivery process.
🚀 Phase 1: Production-Grade Deployment on AWS EC2
We’ll first focus on deploying this application on a real cloud environment using Docker Compose on AWS EC2. This step simulates how real-world applications are scaled and secured for users in production.
You’ll learn how to:
- ✅ Deploy services using Docker Compose on EC2
- 🛡️ Connect to MongoDB Atlas for secure, scalable database hosting
- ⚡ Integrate AWS ElastiCache (Redis) for high-performance session and cache management
- 📦 Store product images on S3, delivered securely via CloudFront CDN
- 🔐 Enable HTTPS using ACM (AWS Certificate Manager)
- 🌐 Set up Route 53 for custom domain and traffic routing
- ⚖️ Configure Application Load Balancer (ALB) for traffic distribution
- 🔒 Apply production-grade security practices:
- IAM-based access control
- Secrets handling
- S3 bucket policies
- Instance hardening
🔄 Phase 2: CI/CD Automation with GitHub Actions
Once the app is successfully running in production, we’ll streamline development and delivery by integrating a GitHub Actions CI/CD pipeline. You’ll learn to:
- ✅ Automatically test every code push
- 📦 Build & deploy Docker images to your registry
- 🚀 Push changes automatically to EC2 via secure pipeline
- 🔍 Integrate security scanning and quality gates for safe, reliable releases
Keep this application running – we’ll use it as the foundation for building enterprise-grade deployment automation!
Resources
- Project Repository: [GitHub Link]
- AWS Free Tier: https://aws.amazon.com/free/
- Docker Documentation: https://docs.docker.com/
- MongoDB Guide: https://docs.mongodb.com/
- React Documentation: https://reactjs.org/docs/
📬 Stay Updated — Join the CLDOP Community!
Are you enjoying this project series? Want to stay ahead with real-world DevOps projects, production-ready deployment guides, and cloud-native architectures?
🔔 Subscribe with your email on cldop.com to get:
🛠️ DevOps tips, tools, and templates that work in real jobs
✉️ Instant updates whenever a new blog post is published
🚀 Hands-on projects delivered right to your inbox
💬 We Value Your Feedback!
Your feedback helps us grow and share better content.
💡 Found something useful? Got suggestions or topics you’d love to see next?
📣 Drop a comment on the blog — your support motivates me to share even more high-quality knowledge with the DevOps community.
Let’s learn and build together.
~ Team CLDOP