CLDOP Real-World DevOps Project Series-Part 2
🛠️ Part 2: Taking Our MERN E-commerce App from Docker Compose to Kubernetes (Kind Cluster)
In Part 1 of this series , we containerized a complete MERN E-commerce application using Docker Compose — building our frontend, backend, and database services into an isolated, production-like environment. That was the first big step in transforming a simple project into a real-world DevOps pipeline.
Now, in Part 2, we’re shifting gears from containers to Kubernetes — and setting up our very own Kind (Kubernetes IN Docker) cluster on Ubuntu.
This part lays the foundation for running our microservices in a scalable, self-healing environment — just like on EKS or GKE, but locally.
We’ll begin by:
🏗️ Creating a Kind cluster (Kubernetes-in-Docker) — your lightweight local K8s setup
🗃️ Deploying MongoDB, Redis, and RabbitMQ using Bitnami Helm charts
💾 Configuring persistent storage with Kubernetes StatefulSets to ensure data durability
🧱 Setting the stage for deploying the MERN app components (frontend & backend) later on
1. Prerequisites and Local Setup (Ubuntu 24.04)
We’ll start by ensuring our local development machine (Ubuntu 24.04) has all the necessary tools and cloud access configured.
1.1. Essential Tool Installation
We need the following tools installed and configured:
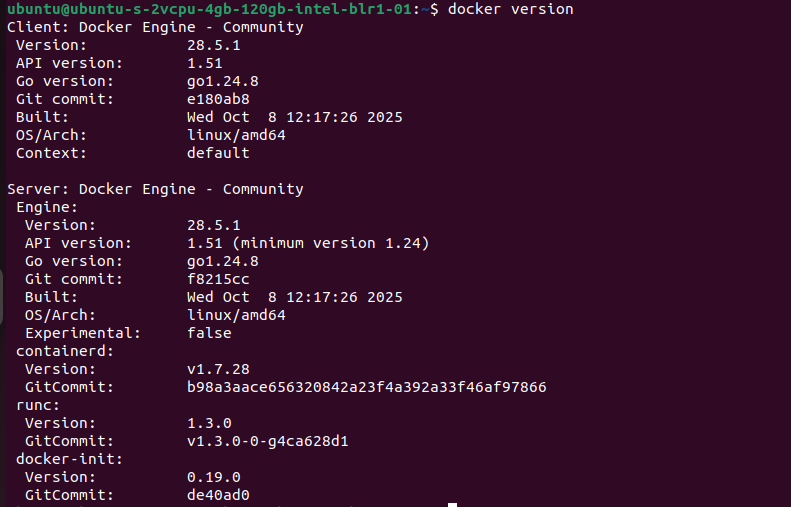
- Docker: To run the kind cluster nodes.
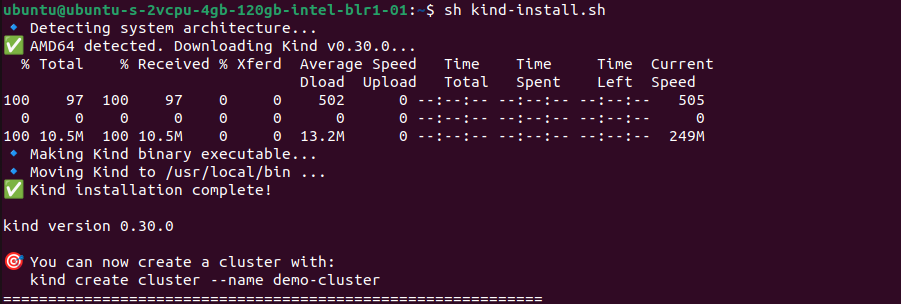
- kind: To create and manage the local Kubernetes cluster.
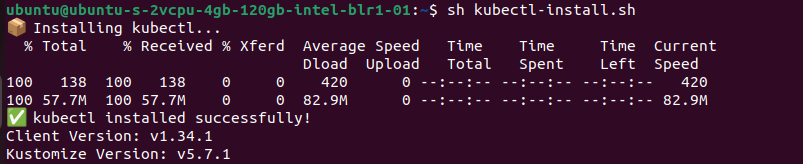
- kubectl: The command-line tool for interacting with the cluster.
- Helm: For templating and deploying our applications and dependencies.
- AWS CLI: For managing AWS resources (ECR, Secrets Manager).


1.2. IAM User Configuration
For seamless interaction with AWS cloud services from our local Ubuntu machine, we’ll configure the AWS CLI using a dedicated IAM user. This approach mirrors production environments where a service account, not a root user, handles external access.
The IAM user has been pre-configured in Part 1 to handle S3 integration. For this K8s deployment, we must ensure the user has the following three essential access policies:
SecretsManagerReadWrite: Required to create, manage, and retrieve our application secrets (like database passwords and JWT keys) from AWS Secrets Manager.
AmazonS3FullAccess: (Pre-configured in Part 1) For any potential S3-based operations (like storing backend logs or static assets).
AmazonEC2ContainerRegistryPowerUser: Required to securely authenticate, push, and pull our MERN stack Docker images from AWS ECR.
2. Deploying the kind Cluster & Storage Class
To mimic a production environment, we’ll configure a multi-node cluster locally.
2.1. Creating a 3-Node kind Cluster
We’ll use a kind-config.yaml file to define a cluster with one control-plane node and two worker nodes.
# 4 node (3 workers) cluster config
# create-kindcluster.yaml
kind: Cluster
apiVersion: kind.x-k8s.io/v1alpha4
name: mern-stack-cluster
nodes:
- role: control-plane
  image: kindest/node:v1.32.0
- role: worker
  image: kindest/node:v1.32.0
- role: worker
  image: kindest/node:v1.32.0


# Command to create the cluster:
# kind create cluster --config=create-kindcluster.yaml
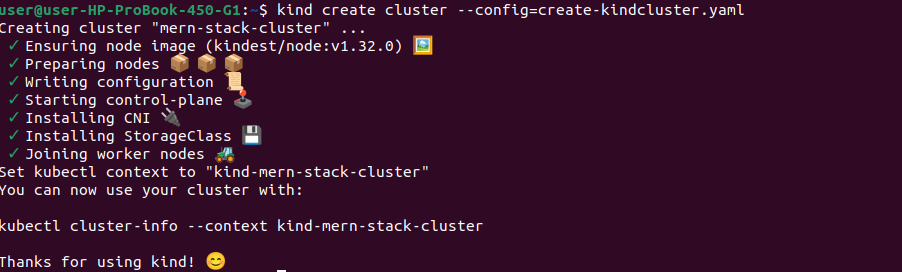
# Verify cluster is running
kubectl cluster-info --context kind-mern-stack-cluster
kubectl get nodes
1.2. Persistent Storage Configuration
2.2. Persistent Storage Configuration (The Local Path Provisioner)
Understanding Kind’s Built-in Storage
Kind clusters come with Rancher’s Local Path Provisioner pre-installed, which works similar to cloud storage controllers like AWS EBS CSI, Azure Disk CSI, or GCP Persistent Disk CSI. This means you can practice production-grade storage patterns locally without any cloud costs!
Check Available StorageClass
# View default StorageClass
kubectl get storageclass
Key Points:
- Provisioner:
rancher.io/local-path(automatically creates PVs) - Reclaim Policy:
Delete(PV deleted when PVC is removed) - Volume Binding Mode:
WaitForFirstConsumer(waits for pod scheduling)
This is similar to how EBS CSI controller works in AWS – when you create a PVC, the storage is automatically provisioned!
Creating Custom StorageClass for Production-like Setup
While the default StorageClass works fine, let’s create a custom one with Retain policy (like production environments):
cat <<EOF | kubectl apply -f -
apiVersion: storage.k8s.io/v1
kind: StorageClass
metadata:
  name: local-storage-retain
provisioner: rancher.io/local-path
volumeBindingMode: WaitForFirstConsumer
reclaimPolicy: Retain
allowVolumeExpansion: true
EOF
or you can copy paste the contents in a file named create-sc-retain.yaml & then run kubectl apply -f create-sc-retain.yaml
kubectl apply -f create-sc-retain.yaml
Why Retain Policy?
- Data persists even after deleting PVCs
- Mimics production backup strategies
- Safe for learning and testing
2.3. Setting Up the MERN Stack Namespace
# Create dedicated namespace for MERN stack
kubectl create namespace mern-stack

# Set as default namespace (optional)
kubectl config set-context --current --namespace=mern-stack

# Verify namespace
kubectl get namespaces | grep mern-stack
Deploy Stateful Applications Using Helm Charts
Now let’s deploy MongoDB, Redis, and RabbitMQ with persistent storage using Bitnami Helm charts – just like you would in production!
2.4. Deploy MongoDB (Database for MERN Stack)
MongoDB is the core database for our MERN application. Let’s deploy it with persistent storage.
# Add Bitnami Helm repository
helm repo add bitnami https://charts.bitnami.com/bitnami
helm repo update
Deploy MongoDB with Persistent Storage
Create Helm Values Directory
Create directory for Helm values
mkdir -p ~/mern-stack-k8s/helm-values
cd ~/mern-stack-k8s/helm-values
Create All Values Files
Create mongodb-values.yaml:
cat > mongodb-values.yaml <<'EOF'
architecture: standalone
# IMPORTANT: By default, standalone creates a Deployment
# Set this to true to create a StatefulSet instead
useStatefulSet: true
auth:
  rootUser: root
  rootPassword: "mernstack123"
  username: "mernapp"
  password: "mernapp123"
  database: "merndb"

persistence:
  enabled: true
  storageClass: "local-storage-retain"
  size: 5Gi

volumePermissions:
  enabled: true

resources:
  requests:
    memory: 512Mi
    cpu: 250m
  limits:
    memory: 1Gi
    cpu: 500m
EOF
Create redis-values.yaml:
cat > redis-values.yaml <<'EOF'
architecture: standalone

auth:
  enabled: false

master:
  persistence:
    enabled: true
    storageClass: "local-storage-retain"
    size: 1Gi

replica:
  replicaCount: 0

resources:
  requests:
    memory: 256Mi
    cpu: 100m
  limits:
    memory: 512Mi
    cpu: 200m
EOF
Note: We’re disabling authentication since:
- Redis is only accessible within the Kubernetes cluster
- Simplifies development and testing
- Common practice for internal services
- Network policies provide cluster-level security
To see all available options:
# View MongoDB chart default values
helm show values bitnami/mongodb > mongodb-defaults.yaml

# View Redis chart default values
helm show values bitnami/redis > redis-defaults.yaml
Deploy MongoDB with Persistent Storage
# Deploy MongoDB using the values file
helm install mongodb bitnami/mongodb \
  --namespace mern-stack \
  --values mongodb-values.yaml

# Check MongoDB deployment
kubectl get pods -n mern-stack -l app.kubernetes.io/name=mongodb
kubectl get pvc -n mern-stack -l app.kubernetes.io/name=mongodb
kubectl get svc -n mern-stack -l app.kubernetes.io/name=mongodb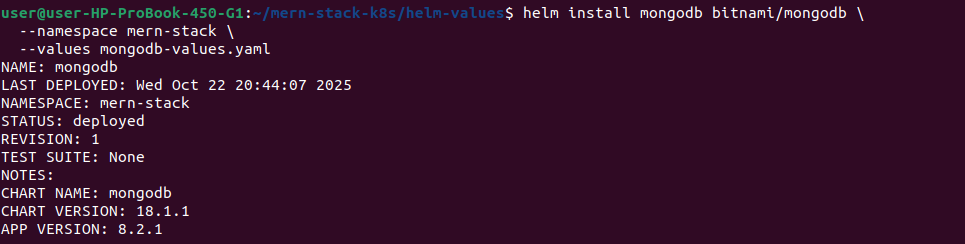

# CRITICAL: Verify MongoDB is deployed as StatefulSet
kubectl get statefulset mongodb -n mern-stack
✅ Verification Checklist:
- Resource type is StatefulSet (not Deployment)
- Pod name is
mongodb-0(ordered naming) - PVC named
datadir-mongodb-0exists - PVC is Bound to a PV
useStatefulSet: truewas set in values.yaml
Test MongoDB Connection
# Connect to MongoDB
kubectl exec -it mongodb-0 -n mern-stack -- mongosh merndb -u mernapp -p mernapp123

# In MongoDB shell, create test collection:
db.users.insertOne({
  name: "Test User",
  email: "test@example.com",
  createdAt: new Date()
})

# Verify data
db.users.find().pretty()

# Exit
exit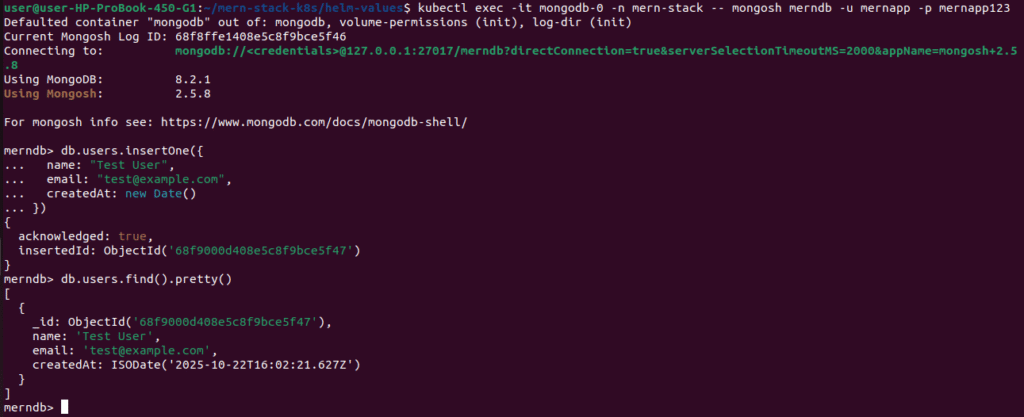
Get MongoDB Connection String
# For MERN application (use application user)
 echo "mongodb://mernapp:mernapp123@mongodb.mern-stack.svc.cluster.local:27017/merndb"
 # For admin tasks (use root user)
  echo "mongodb://root:mernstack123@mongodb.mern-stack.svc.cluster.local:27017/admin"
Note:
- Use
mernappuser for your application connections - Use
rootuser only for administrative tasks
2.5. Deploy Redis (for Session Management)
Redis can be used for session management and caching in your MERN application.
# Deploy Redis using the values file
helm install redis bitnami/redis \
  --namespace mern-stack \
  --values redis-values.yaml

# Check Redis deployment
kubectl get pods -n mern-stack -l app.kubernetes.io/name=redis
kubectl get pvc -n mern-stack -l app.kubernetes.io/name=redis

# Get Redis connection string
echo "redis://redis-master.mern-stack.svc.cluster.local:6379"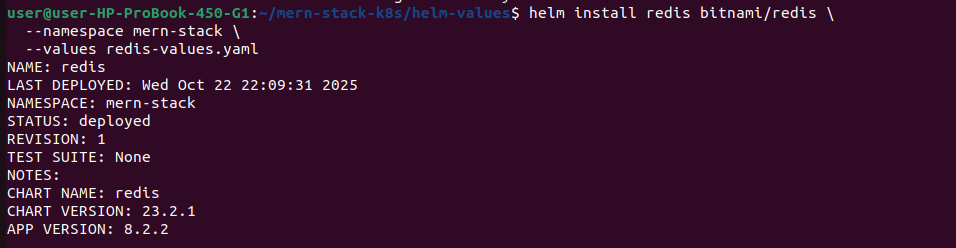

Test Redis Connection
# Connect to Redis (no password needed)
kubectl exec -it redis-master-0 -n mern-stack -- redis-cli

# Test commands
SET test-key "Hello MERN"
GET test-key
exit

2.6. Deploy RabbitMQ (Message Queue)
RabbitMQ will be used in our MERN application for:
- Email notifications – Asynchronous email sending without blocking API requests
- Background job processing – Handling time-consuming tasks
- Microservices communication – Decoupling services
- Event-driven architecture – Publishing and subscribing to events
This ensures our application remains responsive while processing tasks like sending welcome emails, password reset notifications, and user alerts in the background.
Deploy RabbitMQ using StatefulSet (Alternative to Helm)
# Complete RabbitMQ StatefulSet Configuration for MERN Stack
# Using official RabbitMQ image (more reliable than Bitnami)

---
# Secret for RabbitMQ credentials
apiVersion: v1
kind: Secret
metadata:
  name: rabbitmq-secret
  namespace: mern-stack
type: Opaque
stringData:
  rabbitmq-username: "admin"
  rabbitmq-password: "Admin12345"

---
# Headless Service for StatefulSet
apiVersion: v1
kind: Service
metadata:
  name: rabbitmq-headless
  namespace: mern-stack
  labels:
    app: rabbitmq
spec:
  clusterIP: None
  ports:
  - name: amqp
    port: 5672
    targetPort: 5672
  - name: management
    port: 15672
    targetPort: 15672
  selector:
    app: rabbitmq

---
# Service for external access
apiVersion: v1
kind: Service
metadata:
  name: rabbitmq
  namespace: mern-stack
  labels:
    app: rabbitmq
spec:
  type: ClusterIP
  ports:
  - name: amqp
    port: 5672
    targetPort: 5672
  - name: management
    port: 15672
    targetPort: 15672
  selector:
    app: rabbitmq

---
# RabbitMQ StatefulSet
apiVersion: apps/v1
kind: StatefulSet
metadata:
  name: rabbitmq
  namespace: mern-stack
  labels:
    app: rabbitmq
spec:
  serviceName: rabbitmq-headless
  replicas: 1
  selector:
    matchLabels:
      app: rabbitmq
  template:
    metadata:
      labels:
        app: rabbitmq
    spec:
      containers:
      - name: rabbitmq
        image: rabbitmq:3.13-management  # Official RabbitMQ with management UI
        ports:
        - name: amqp
          containerPort: 5672
          protocol: TCP
        - name: management
          containerPort: 15672
          protocol: TCP

        env:
        - name: RABBITMQ_DEFAULT_USER
          valueFrom:
            secretKeyRef:
              name: rabbitmq-secret
              key: rabbitmq-username
        - name: RABBITMQ_DEFAULT_PASS
          valueFrom:
            secretKeyRef:
              name: rabbitmq-secret
              key: rabbitmq-password

        resources:
          requests:
            memory: 512Mi
            cpu: 250m
          limits:
            memory: 1Gi
            cpu: 500m

        volumeMounts:
        - name: rabbitmq-data
          mountPath: /var/lib/rabbitmq

        livenessProbe:
          exec:
            command:
            - rabbitmq-diagnostics
            - -q
            - ping
          initialDelaySeconds: 60
          periodSeconds: 30
          timeoutSeconds: 10
          failureThreshold: 3

        readinessProbe:
          exec:
            command:
            - rabbitmq-diagnostics
            - -q
            - check_running
          initialDelaySeconds: 20
          periodSeconds: 10
          timeoutSeconds: 5
          failureThreshold: 3

  volumeClaimTemplates:
  - metadata:
      name: rabbitmq-data
      labels:
        app: rabbitmq
    spec:
      accessModes:
      - ReadWriteOnce
      storageClassName: local-storage-retain
      resources:
        requests:
          storage: 5Gi
Quick Deployment
Step 1: Save the YAML
Save the StatefulSet YAML as rabbitmq-statefulset.yaml
#Deploy the rabbit-mq

kubectl apply -f rabbitmq-statefulset.yaml

#Watch pod start

kubectl get pods -n mern-stack -l app=rabbitmq -w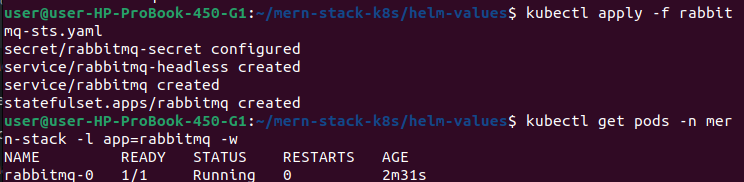
Step 3: Verify Deployment
# Check StatefulSet
kubectl get statefulset rabbitmq -n mern-stack

# Expected output:
# NAME       READY   AGE
# rabbitmq   1/1     2m

# Check pod (should be rabbitmq-0)
kubectl get pods -n mern-stack -l app=rabbitmq

# Check PVC (automatically created)
kubectl get pvc -n mern-stack -l app=rabbitmq

# Check services
kubectl get svc -n mern-stack -l app=rabbitmq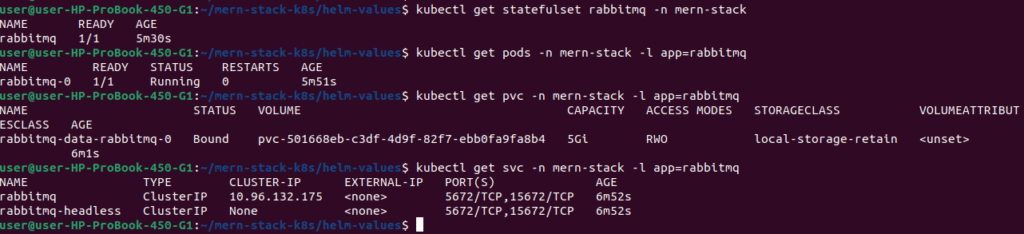
Access RabbitMQ
Method : Port Forward (For Testing)
# Forward both AMQP and Management UI ports
kubectl port-forward -n mern-stack svc/rabbitmq 5672:5672 15672:15672

# Access Management UI: http://localhost:15672
# Login: admin / Admin12345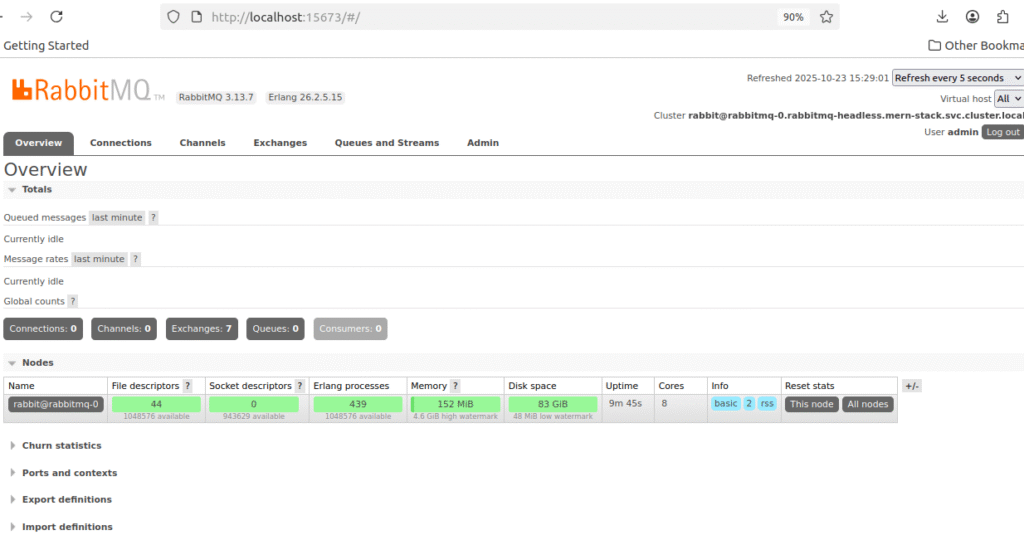
Note : in my machine already one rabbitmq service is running ,so had to change ports 5673&15673
Verify RabbitMQ is Working
# Check logs
kubectl logs -n mern-stack rabbitmq-0 --tail=50
# Exec into pod
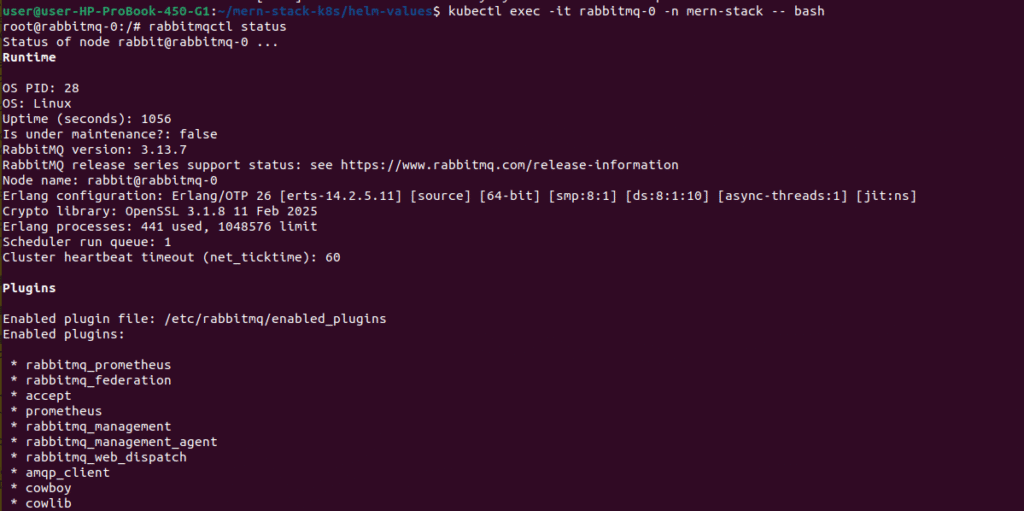
kubectl exec -it rabbitmq-0 -n mern-stack -- bash
# Inside the pod, check RabbitMQ status
rabbitmqctl status
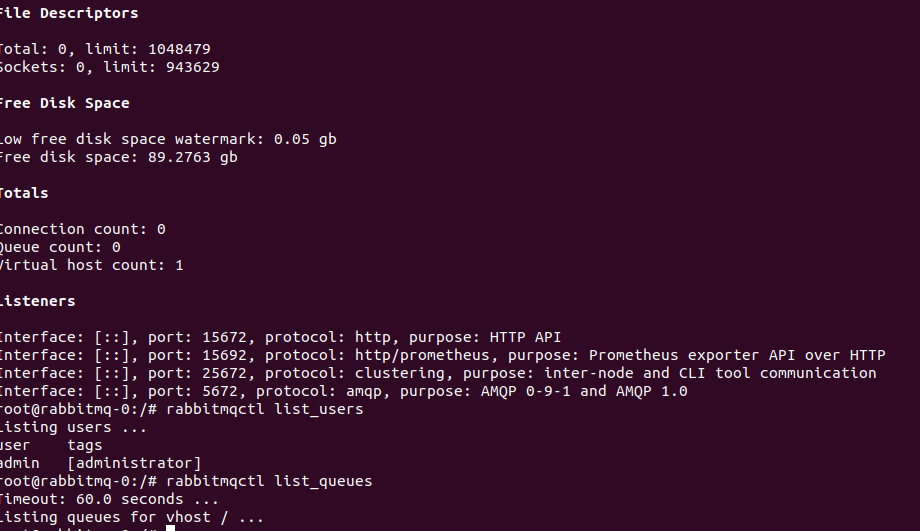
# List users
rabbitmqctl list_users
# List queues
rabbitmqctl list_queues
# Exit
exit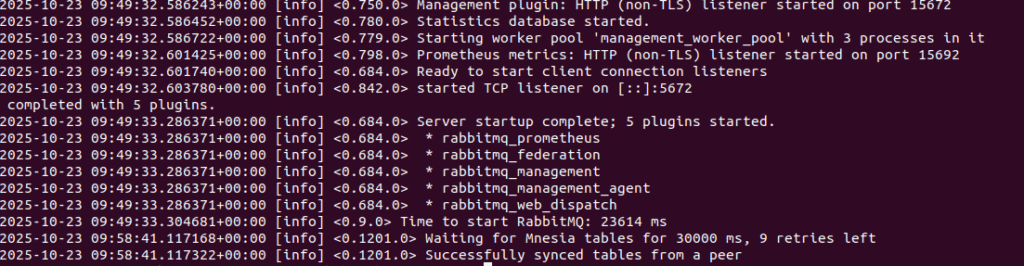
# Get RabbitMQ connection string
echo "amqp://admin:Admin12345@rabbitmq.mern-stack.svc.cluster.local:5672"
amqp://admin:Admin12345@rabbitmq.mern-stack.svc.cluster.local:5672
2.7. Verify Data Persistence
Let’s test that our data survives pod restarts – crucial for production!
Understanding StatefulSets: When you deployed MongoDB, Redis, and RabbitMQ with persistence.enabled: true, Helm created StatefulSets (not Deployments). StatefulSets are designed for stateful applications and provide:
- Stable pod names (mongodb-0, not random suffixes)
- Stable storage (each pod keeps its PVC even after deletion)
- Ordered pod creation and deletion
Test MongoDB Persistence
# Create test data in MongoDB
kubectl exec -it mongodb-0 -n mern-stack -- mongosh merndb -u mernapp -p mernapp123 \
  --eval "db.persistence_test.insertOne({message: 'Data before restart', timestamp: new Date()})"

# Delete the MongoDB pod
kubectl delete pod mongodb-0 -n mern-stack

# Wait for pod to recreate
kubectl wait --for=condition=ready pod mongodb-0 -n mern-stack --timeout=180s

# Verify data persists
kubectl exec -it mongodb-0 -n mern-stack -- mongosh merndb -u mernapp -p mernapp123 \
  --eval "db.persistence_test.find().pretty()"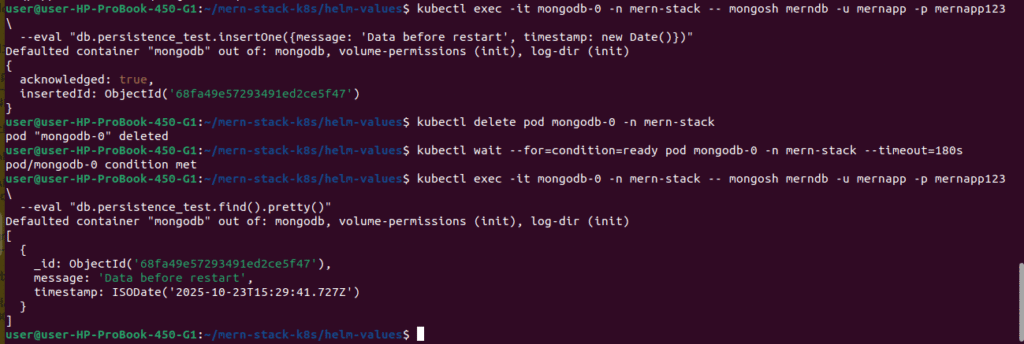
Test RabbitMQ Persistence
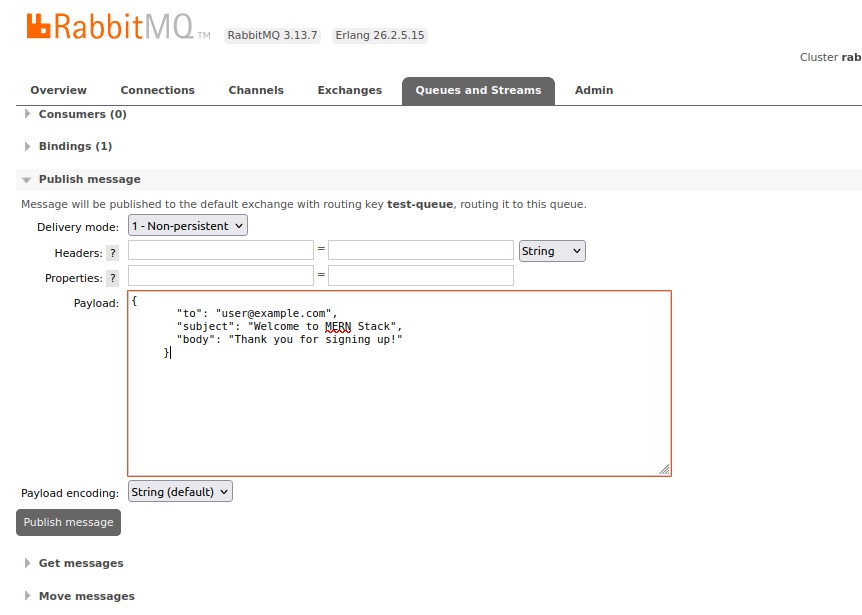
# Access Management UI and create a test queue
kubectl port-forward -n mern-stack svc/rabbitmq 15672:15672
# 1. Open http://localhost:15672 (login: admin/Admin12345)
# 2. Go to "Queues" tab and create a queue named "test-queue"
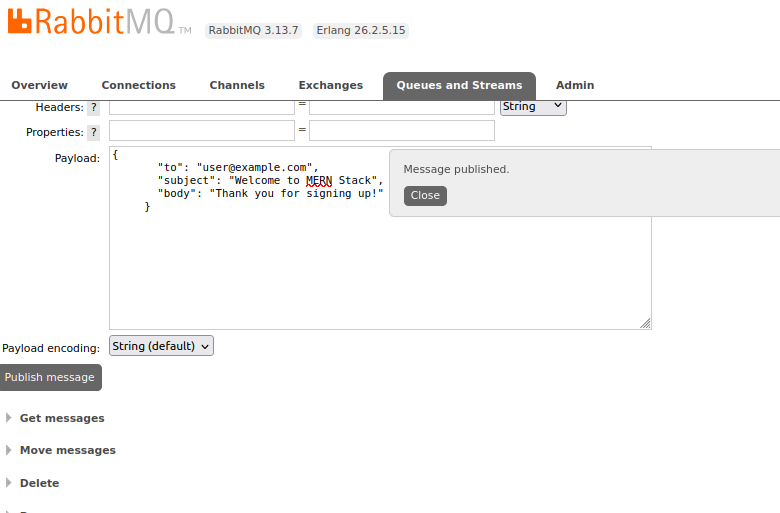
# 3. Publish a test message
# Delete RabbitMQ pod
kubectl delete pod rabbitmq-0 -n mern-stack
# Wait for recreation
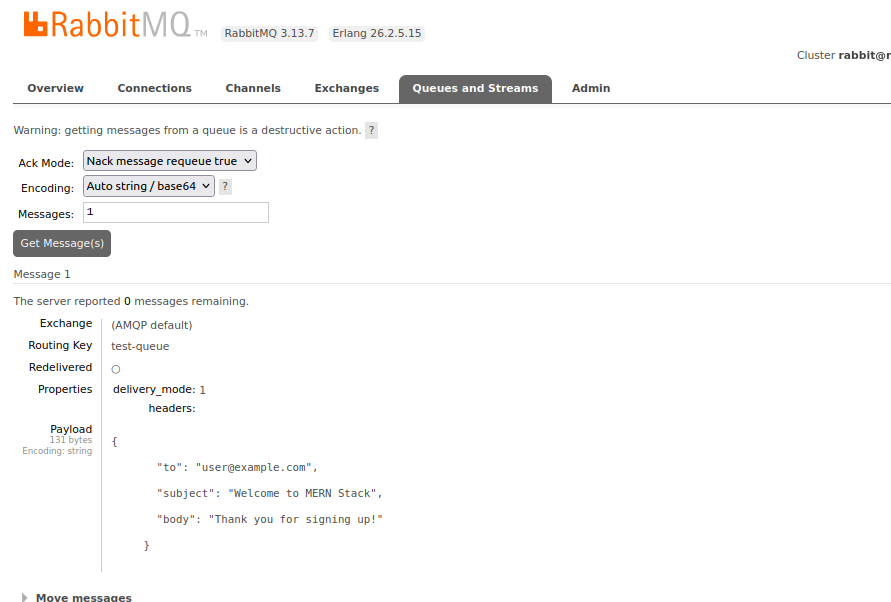
kubectl wait --for=condition=ready pod rabbitmq-0 -n mern-stack --timeout=180s
# Verify queue and message still exist in Management UI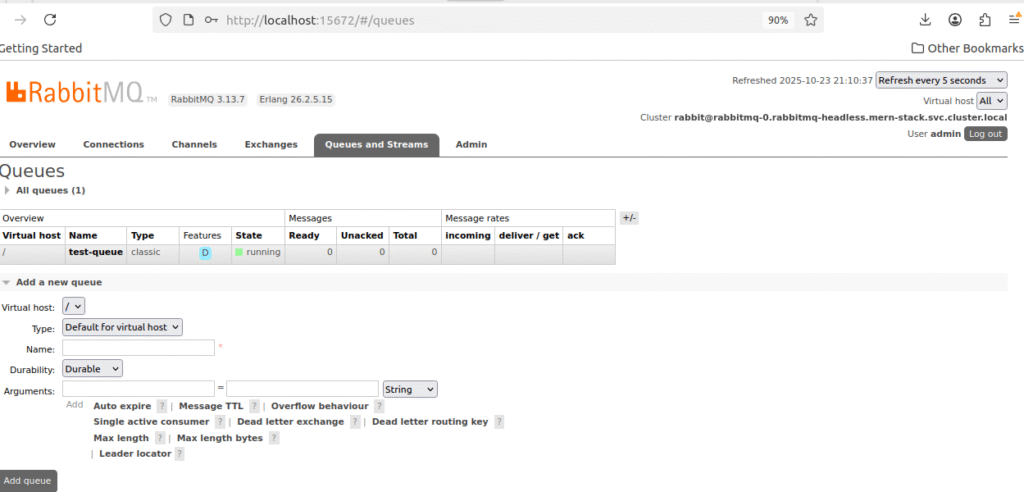
2.8. View All MERN Stack Resources
# View all resources in mern-stack namespace
kubectl get all -n mern-stack

# View StatefulSets
kubectl get statefulsets -n mern-stack

# View storage resources
kubectl get pvc -n mern-stack
kubectl get pv

# View services
kubectl get svc -n mern-stack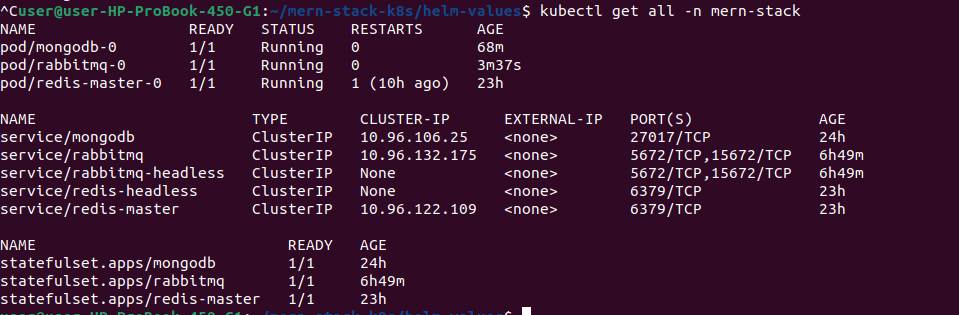


2.10. Environment Variables for MERN Application
When deploying your MERN application (from Part 1), use these connection strings:
# Backend environment variables
env:
  - name: MONGODB_URI
    value: "mongodb://mernapp:mernapp123@mongodb.mern-stack.svc.cluster.local:27017/merndb"

  - name: REDIS_URL
    value: "redis://redis-master.mern-stack.svc.cluster.local:6379"

  - name: RABBITMQ_URL
    value: "amqp://admin:Admin12345@rabbitmq.mern-stack.svc.cluster.local:5672
Summary
✅ Kind cluster running on local Ubuntu machine
✅ Custom StorageClass with Retain policy for data safety
✅ MongoDB StatefulSet deployed with 5Gi persistent storage (useStatefulSet: true)
✅ Redis deployed for session management (auth disabled)
✅ RabbitMQ deployed for message queuing
✅ Data persistence verified across pod restarts
✅ Connection strings ready for MERN application
In Part 3, we’ll deploy the MERN application (from Part 1) to this Kind cluster, connect it to MongoDB/Redis/RabbitMQ, and set up Ingress for external access!
Connection Strings
# MongoDB connection for MERN app (use mernapp user)
mongodb://mernapp:mernapp123@mongodb.mern-stack.svc.cluster.local:27017/merndb

# MongoDB admin connection (use root user)
mongodb://root:mernstack123@mongodb.mern-stack.svc.cluster.local:27017/admin

# Redis connection (no authentication)
redis://redis-master.mern-stack.svc.cluster.local:6379

# RabbitMQ AMQP connection
amqp://admin:Admin12345@rabbitmq.mern-stack.svc.cluster.local:5672

# RabbitMQ Management API
http://rabbitmq.mern-stack.svc.cluster.local:15672

# Access MongoDB shell (as mernapp user)
kubectl exec -it mongodb-0 -n mern-stack -- mongosh merndb -u mernapp -p mernapp123

# Access MongoDB shell (as root user)
kubectl exec -it mongodb-0 -n mern-stack -- mongosh admin -u root -p mernstack123

# Access Redis CLI (no password)
kubectl exec -it redis-master-0 -n mern-stack -- redis-cli

# Access RabbitMQ CLI
kubectl exec -it rabbitmq-0 -n mern-stack -- rabbitmqctl status

# View all resources
kubectl get all -n mern-stack
Conclusion
Congratulations! You’ve successfully built a production-grade local Kubernetes environment with persistent storage – completely free on your Ubuntu machine!
What We Accomplished
In this tutorial, we set up a complete infrastructure foundation for our MERN stack application. We created a Kind cluster with a custom StorageClass called mern-storage that uses a Retain policy for data safety. We deployed MongoDB as a StatefulSet with 5Gi of persistent storage and proper authentication, Redis with 1Gi for session management and caching, and RabbitMQ as a StatefulSet with 5Gi for handling email notifications through message queuing. Most importantly, we verified that all our data persists even when pods are deleted and recreated.
What’s Next?
In Part 3, we’ll bring everything together by deploying our MERN application. We’ll deploy the React frontend and Node.js/Express backend, connect the backend to MongoDB and Redis, configure a RabbitMQ consumer worker to handle email notifications in the background, set up Ingress for external access to our application, and configure environment variables using ConfigMaps and Secrets.
Resources
Kind Documentation: https://kind.sigs.k8s.io/
Kubernetes Storage Docs: https://kubernetes.io/docs/concepts/storage/
Part 1 (MERN App Setup): https://cldop.com/cldop-real-world-devops-project-series/