PART 3: Advanced CI/CD Pipeline with Jenkins, SonarQube, Trivy
In the first part of this series, we set up a CI/CD pipeline with Jenkins, SonarQube, and Trivy to automate our build and security scanning processes. In the second part, we explored integrating Snyk for additional security scanning. Now, in this third installment, we’ll focus on advanced optimization techniques to make our pipeline faster and more efficient.
Introduction
Modern CI/CD pipelines need to be both thorough and fast. While our previous implementations provided comprehensive security scanning and quality checks, build times were a concern – especially for Docker image builds. In this guide, we’ll explore advanced techniques to reduce build times through Docker layer caching, multi-stage builds, and parallel processing.
🔥 Key Highlights in This Part
🐳 1. Secure and Minimal Dockerfiles for Backend and Frontend
Both Node.js backend and frontend Dockerfiles were refactored to follow strict container hardening guidelines:
- Based on
node:21-alpinefor smaller, safer images. - Use
npm ciwithpackage-lock.jsonfor reproducible builds. - Clean separation of dependency, build, and runtime stages.
- Final image runs as a non-root
appuser.
✅ Benefits:
- Reduced image size & attack surface
- Ensures production-only dependencies
- Aligned with Docker and OWASP best practices
🧪 2. Jenkins Pipeline with Trivy, SonarQube & Slack Alerts
Our streamlined Jenkinsfile now includes:
- Git checkout & dependency installation
- Static code analysis via SonarQube
- Vulnerability scanning using Trivy (both filesystem & image)
- Markdown, HTML, and JSON reports for auditing
- Docker image build & push
- Remote deployment via Docker Compose
- Slack notifications on success/failure
Optimized Multi-Stage Dockerfiles
Layer caching works best with properly structured Dockerfiles. We’ve redesigned our Dockerfiles to maximize cache utilization through thoughtful layer ordering and multi-stage builds.
Frontend and Backend Dockerfile Optimizations
Optimized Frontend Dockerfile
Our optimized frontend Dockerfile:
# -------- Stage 1: Dependencies --------
FROM node:21-alpine AS deps
WORKDIR /app

# Copy package files for dependency installation
COPY package*.json ./

# Install all dependencies (including dev dependencies needed for build)
RUN npm ci --prefer-offline --no-audit || npm install --prefer-offline --no-audit

# -------- Stage 2: Build --------
FROM node:21-alpine AS builder
WORKDIR /app

# Copy dependencies from deps stage
COPY --from=deps /app/node_modules ./node_modules
COPY . .

# Build the application
RUN npm run build

# -------- Stage 3: Runtime (minimal) --------
FROM node:21-alpine AS runtime
WORKDIR /app

# Install only production dependencies for serving
COPY package*.json ./
RUN npm ci --only=production --prefer-offline --no-audit || npm install --only=production --prefer-offline --no-audit \
    && npm cache clean --force

# Copy built files from builder stage
COPY --from=builder /app/dist ./dist

# Create non-root user
RUN addgroup -S appgroup && \
    adduser -S appuser -G appgroup && \
    chown -R appuser:appgroup /app

# Switch to non-root user
USER appuser

# Expose the app port
EXPOSE 5173

# Run the preview server (for production builds)
CMD ["npm", "run", "preview", "--", "--host"]
The results have been impressive:
Optimized Backend Dockerfile
For our backend service, we’ve created a similarly optimized multi-stage Dockerfile:
# syntax=docker/dockerfile:1.4

# =====================
# Stage 1: Dependencies
# =====================
FROM node:21-alpine AS deps
WORKDIR /app

# Copy package files for dependency installation
COPY package*.json ./

# Install dependencies with optimized flags
RUN npm ci --no-audit --prefer-offline --no-fund || npm install --no-audit --prefer-offline --no-fund
RUN npm cache clean --force

# ===================
# Stage 2: Build stage
# ===================
FROM node:21-alpine AS build
WORKDIR /app

# Copy dependencies from previous stage
COPY --from=deps /app/node_modules ./node_modules
COPY package*.json ./

# Copy all application code (we'll use a more generic approach)
COPY . .

# ==========================
# Stage 3: Production stage
# ==========================
FROM node:21-alpine AS production
WORKDIR /app

# Set NODE_ENV
ENV NODE_ENV=production

# Copy package files for production dependencies
COPY package*.json ./

# Install only production dependencies with optimized flags
RUN npm ci --only=production --no-audit --prefer-offline --no-fund || npm install --only=production --no-audit --prefer-offline --no-fund
RUN npm cache clean --force

# Copy application code from build stage (copy everything except node_modules)
COPY --from=build /app/. ./
RUN rm -rf node_modules

# Create non-root user with minimal privileges using Alpine syntax
RUN addgroup -S appgroup && \
    adduser -S appuser -G appgroup && \
    chown -R appuser:appgroup /app

# Switch to non-root user
USER appuser

# Expose API port
EXPOSE 5000

# Use exec form of CMD for proper signal handling
CMD ["npm", "start"]
Key Optimization Strategies
Both our frontend and backend Dockerfiles implement several optimization strategies:
- Multi-stage Builds
- Using separate stages for dependencies, build, and runtime
- Only copying necessary artifacts between stages
- Significantly reduces final image size
- Strategic Layer Ordering
- Files that change less frequently (package.json, config files) are copied before source code
- Dependencies are installed in a separate stage
- Maximizes cache utilization during rebuilds
- Minimizing Build Context
- Only copying necessary files at each stage
- Using .dockerignore to exclude unnecessary files
- Reduces the amount of data sent to the Docker daemon
- Optimizing npm Settings
- Using flags like –no-audit, –prefer-offline, and –no-fund
- Explicitly cleaning npm cache to reduce image size
- Environment variables for frontend to skip progress bars
- Security Enhancements
- Running as a non-root user with minimal permissions
- Using Alpine-based images for smaller attack surface
- Setting NODE_ENV=production for backend
These changes not only improved build times but also reduced our image size from 1.2GB to 337MB initially, with further optimizations bringing it down even more.
Enhanced Pipeline Visualization with Blue Ocean
To better visualize our pipeline performance and get detailed insights into stage execution times, we installed the Blue Ocean plugin for Jenkins. This modern UI provides a clear, visual representation of the CI/CD pipeline and makes it easier to identify bottlenecks.
Installing Blue Ocean Plugin
- Navigate to Jenkins Dashboard > Manage Jenkins > Plugins > Available plugins
- Search for “Blue Ocean”
- Select “Blue Ocean” and click “Install without restart”
- After installation completes, you’ll see a “Blue Ocean” link in the left sidebar
Blue Ocean provides several advantages for monitoring pipeline performance:
- Visual representation of pipeline stages and parallel tasks
- Real-time stage execution times
- Detailed logs accessible with a single click
- Pipeline run comparison to track improvements over time
Slack Integration for Real-Time Pipeline Notifications
Keeping the team informed about pipeline results is crucial. We’ve integrated Slack notifications to provide real-time updates on build status without requiring team members to constantly check Jenkins.
Setting Up Jenkins-Slack Integration
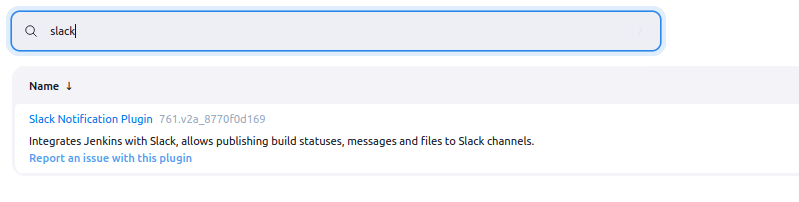
Step 1: Install the Slack Notification Plugin in Jenkins
Navigate to your Jenkins dashboard and follow these simple steps:
- Go to Manage Jenkins > Manage Plugins
- Select the Available tab
- Search for “Slack Notification Plugin“
- Check the box and click Install without restart
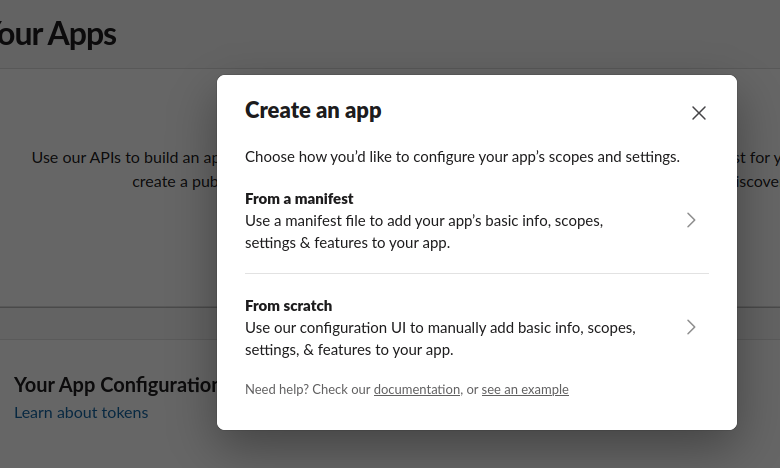
Step 2: Create a Slack App for Jenkins
- Visit https://api.slack.com/apps and click Create New App
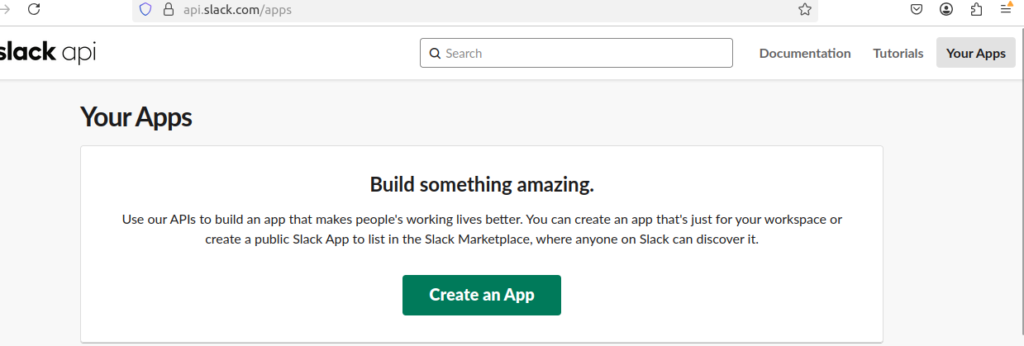
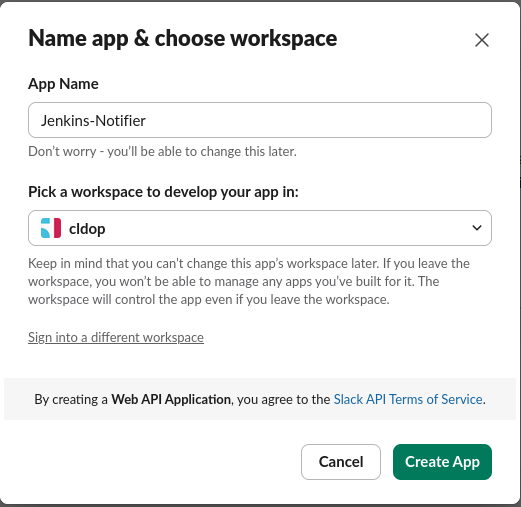
Choose “From scratch” and give your app a name like “Jenkins Notifications”
Select your workspace and click Create App
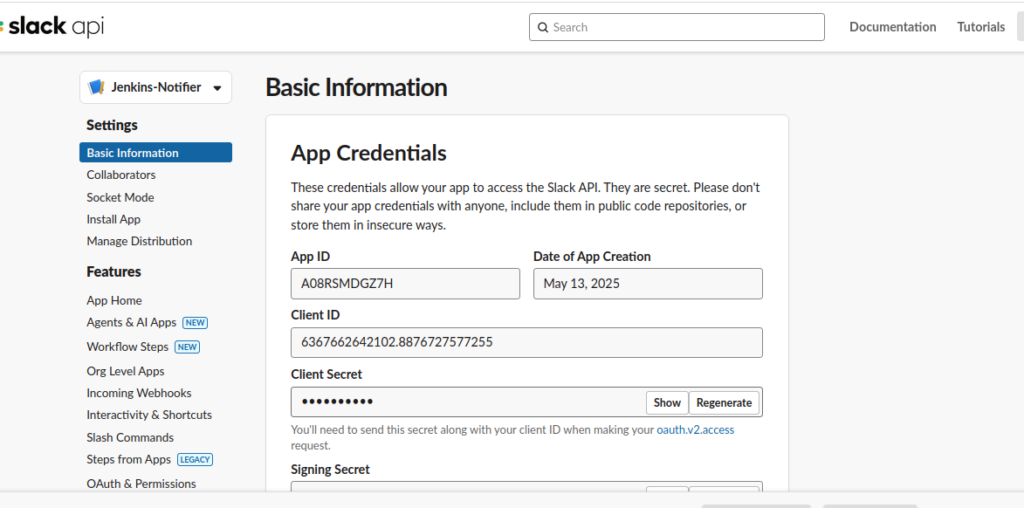
Step 3: Configure Bot Permissions
In your Slack app settings, navigate to OAuth & Permissions Under Bot Token Scopes, add these permissions:
channels:readchat:writechat:write.customizefiles:write
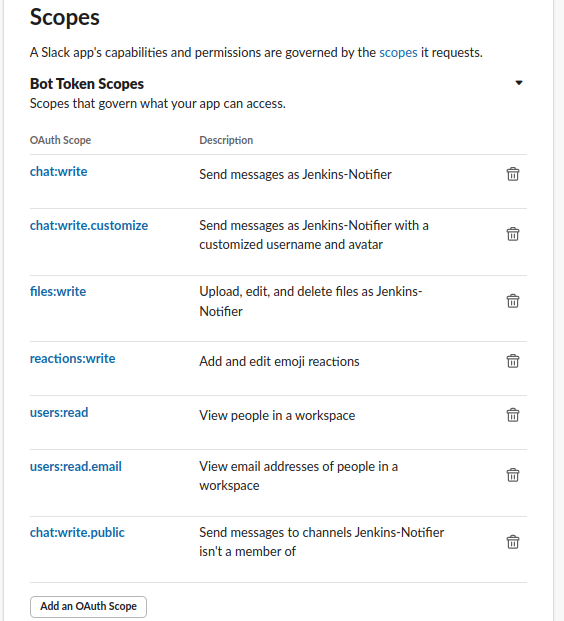
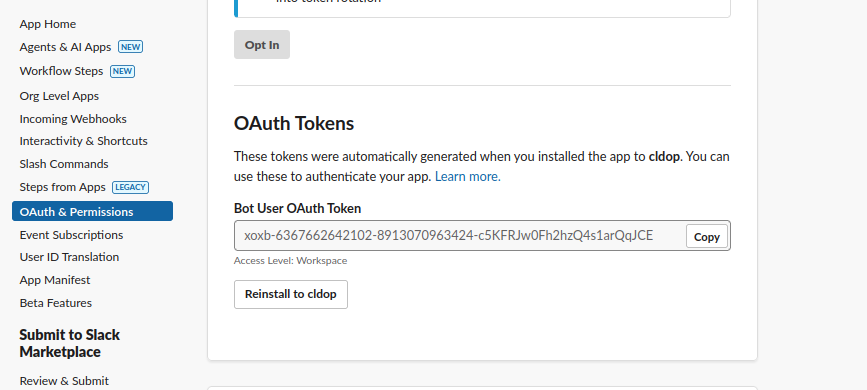
Click Install to Workspace and authorize the app Copy the Bot User OAuth Token (it starts with xoxb-)

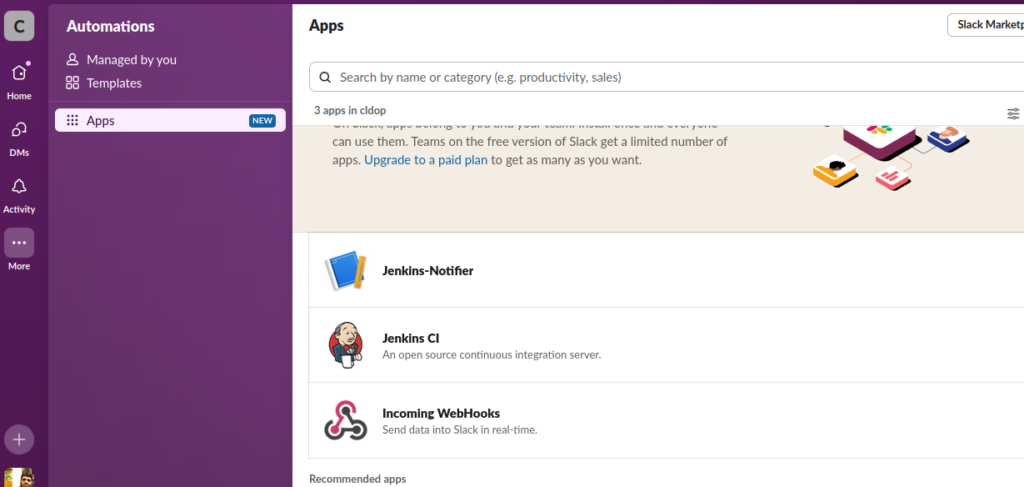
Step 4: Add the App to Your Slack Channels
This critical step ensures your bot can post notifications to your desired channels:
- In Slack, find your new app under Apps in the sidebar
- Right-click on the app and select Open app details

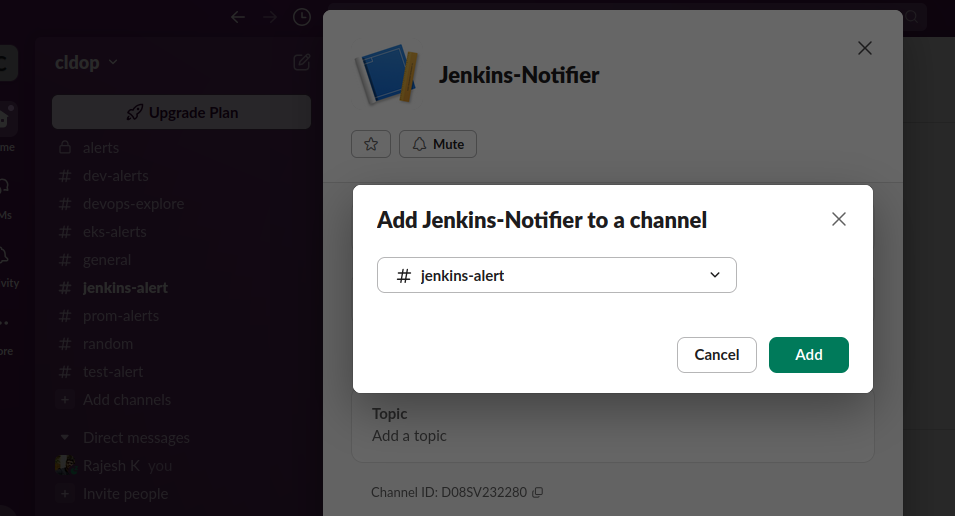
3.Select each channel where you want to receive build notifications
4.Click Add this app to a channel
Step 5: Configure Jenkins Credentials
- In Jenkins, go to Manage Jenkins > Credentials > System
- Click Global credentials > Add Credentials
- Choose Secret text type
- Paste your Slack Bot Token and set ID to “slack-notify”
- Add a description and click OK
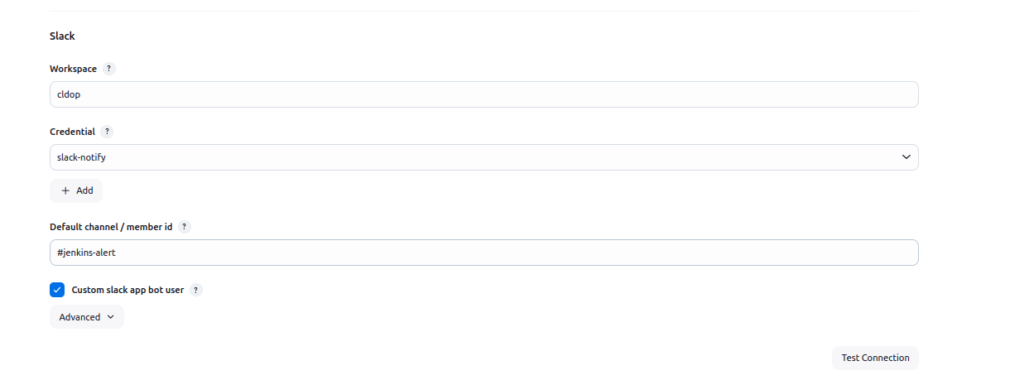
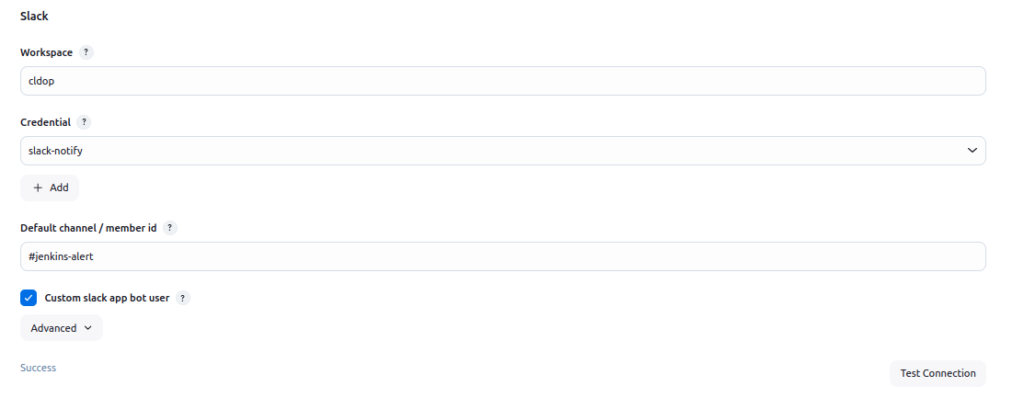
Step 6: Configure Jenkins-Slack Connection
- Go to Manage Jenkins > System Configuration
- Find the Slack section
- Set your workspace name
- Select your “slack-notify” credential from the dropdown
- Add a default channel (e.g., “#jenkins-alert”)
- Click Test Connection to verify everything works
To know more about slack jenkins setup check : https://www.cloudbees.com/blog/see-build-status-in-slack-with-jenkins-slack-integration
Adding Slack Notifications to Your Pipeline
Add this code to your Jenkinsfile for beautiful, informative notifications:
post {
    success {
        slackSend(
            channel: "#jenkins-alerts",
            color: "good",
            message: "✅ *BUILD SUCCESSFUL:* ${env.JOB_NAME} #${env.BUILD_NUMBER}\n🔗 <${env.BUILD_URL}|View Build Details>"
        )
    }
    failure {
        slackSend(
            channel: "#jenkins-alerts",
            color: "danger",
            message: "❌ *BUILD FAILED:* ${env.JOB_NAME} #${env.BUILD_NUMBER}\n🔗 <${env.BUILD_URL}|View Build Details>"
        )
    }
}
Final Pipeline script with all the changes
pipeline {
    agent { label 'agent' }

    tools {
        jdk 'jdk21'
        nodejs 'node21'
    }

    environment {
        IMAGE_TAG = "${BUILD_NUMBER}"
        BACKEND_IMAGE = "rjshk013/wanderlust-backend"
        FRONTEND_IMAGE = "rjshk013/wanderlust-frontend"
    }

    stages {
        stage('SCM Checkout') {
            steps {
                git branch: 'main', url: 'https://github.com/rjshk013/devops-projects.git'
            }
        }

        stage('Install Dependencies') {
            steps {
                dir('wanderlust-3tier-project/backend') {
                    sh "npm install || true"
                }
                dir('wanderlust-3tier-project/frontend') {
                    sh "npm install"
                }
            }
        }

        stage('Run SonarQube') {
            environment {
                scannerHome = tool 'sonar-scanner'
            }
            steps {
                withSonarQubeEnv('sonar-server') {
                    sh """
                        ${scannerHome}/bin/sonar-scanner \
                        -Dsonar.projectKey=blog-app \
                        -Dsonar.projectName=blog-app \
                        -Dsonar.sources=wanderlust-3tier-project
                    """
                }
            }
        }

        stage('Trivy Filesystem Scan') {
            steps {
                script {
                    def trivyDir = "${WORKSPACE}/trivy-reports"
                    sh "mkdir -p ${trivyDir}"

                    // Define targets for filesystem scanning
                    def fsTargets = [
                        [path: "${WORKSPACE}/wanderlust-3tier-project/backend", name: "backend-fs"],
                        [path: "${WORKSPACE}/wanderlust-3tier-project/frontend", name: "frontend-fs"]
                    ]

                    // Run filesystem scans for source code vulnerabilities
                    for (target in fsTargets) {
                        echo "🔍 Scanning filesystem at ${target.path}..."

                        // Scan for vulnerabilities in dependencies
                        sh """
                            docker run --rm \
                                -v ${target.path}:/target \
                                -v ${trivyDir}:/reports \
                                aquasec/trivy fs \
                                --security-checks vuln \
                                --severity HIGH,CRITICAL \
                                --exit-code 0 \
                                --format table \
                                /target > ${trivyDir}/trivy-${target.name}-vuln.txt
                        """

                        // Scan for security issues in configuration files
                        sh """
                            docker run --rm \
                                -v ${target.path}:/target \
                                -v ${trivyDir}:/reports \
                                aquasec/trivy fs \
                                --security-checks config \
                                --severity HIGH,CRITICAL \
                                --exit-code 0 \
                                --format json \
                                /target > ${trivyDir}/trivy-${target.name}-config.json
                        """

                        // Generate an HTML report for easier reading
                        sh """
                            docker run --rm \
                                -v ${target.path}:/target \
                                -v ${trivyDir}:/reports \
                                aquasec/trivy fs \
                                --security-checks vuln,config \
                                --severity HIGH,CRITICAL \
                                --exit-code 0 \
                                --format template \
                                --template '@/contrib/html.tpl' \
                                /target > ${trivyDir}/trivy-${target.name}-report.html
                        """
                    }

                    // Add filesystem scan summary to the main report
                    sh """
                        echo "\\n## Source Code Vulnerability Scan" >> ${trivyDir}/summary.md
                        echo "### Backend Source Vulnerabilities" >> ${trivyDir}/summary.md
                        echo '```' >> ${trivyDir}/summary.md
                        grep -A 10 "CRITICAL\\|HIGH" ${trivyDir}/trivy-backend-fs-vuln.txt | head -20 >> ${trivyDir}/summary.md
                        echo "\\n... (See full report for more details)" >> ${trivyDir}/summary.md
                        echo '```' >> ${trivyDir}/summary.md

                        echo "\\n### Frontend Source Vulnerabilities" >> ${trivyDir}/summary.md
                        echo '```' >> ${trivyDir}/summary.md
                        grep -A 10 "CRITICAL\\|HIGH" ${trivyDir}/trivy-frontend-fs-vuln.txt | head -20 >> ${trivyDir}/summary.md
                        echo "\\n... (See full report for more details)" >> ${trivyDir}/summary.md
                        echo '```' >> ${trivyDir}/summary.md
                    """
                }
            }
        }

        stage('Docker Build') {
            steps {
                dir('wanderlust-3tier-project') {
                    sh '''
                        docker build -t ${BACKEND_IMAGE}:${IMAGE_TAG} -f ./backend/Dockerfile_optimized  ./backend
                        docker build -t ${FRONTEND_IMAGE}:${IMAGE_TAG} -f ./frontend/Dockerfile_optimized ./frontend
                    '''
                }
            }
        }

        stage('Trivy Image Scan') {
            steps {
                script {
                    def trivyDir = "${WORKSPACE}/trivy-reports"

                    // Define scan configurations
                    def images = [
                        [name: "${BACKEND_IMAGE}:${IMAGE_TAG}", type: "backend"],
                        [name: "${FRONTEND_IMAGE}:${IMAGE_TAG}", type: "frontend"]
                    ]

                    // Run scans with multiple output formats
                    for (img in images) {
                        echo "🔍 Scanning ${img.name}..."

                        // HTML Report - Highly readable in browser
                        sh """
                            docker run --rm \
                                -v /var/run/docker.sock:/var/run/docker.sock \
                                -v \$HOME/.trivy-cache:/root/.cache/ \
                                -v ${trivyDir}:/reports \
                                aquasec/trivy image \
                                --scanners vuln \
                                --severity HIGH,CRITICAL \
                                --exit-code 0 \
                                --format template \
                                --template '@/contrib/html.tpl' \
                                ${img.name} > ${trivyDir}/trivy-${img.type}-report.html
                        """

                        // Table format for console and archive
                        sh """
                            docker run --rm \
                                -v /var/run/docker.sock:/var/run/docker.sock \
                                -v \$HOME/.trivy-cache:/root/.cache/ \
                                -v ${trivyDir}:/reports \
                                aquasec/trivy image \
                                --scanners vuln \
                                --severity HIGH,CRITICAL \
                                --exit-code 0 \
                                --format table \
                                ${img.name} > ${trivyDir}/trivy-${img.type}-report.txt
                        """

                        // JSON format for potential programmatic processing
                        sh """
                            docker run --rm \
                                -v /var/run/docker.sock:/var/run/docker.sock \
                                -v \$HOME/.trivy-cache:/root/.cache/ \
                                -v ${trivyDir}:/reports \
                                aquasec/trivy image \
                                --scanners vuln \
                                --severity HIGH,CRITICAL \
                                --exit-code 0 \
                                --format json \
                                ${img.name} > ${trivyDir}/trivy-${img.type}-report.json
                        """
                    }

                    // Generate combined summary report - FIXED SECTION
                    sh """
                        echo "# Trivy Vulnerability Summary Report" > ${trivyDir}/summary.md
                        echo "## Images Scanned" >> ${trivyDir}/summary.md
                        echo "- ${BACKEND_IMAGE}:${IMAGE_TAG}" >> ${trivyDir}/summary.md
                        echo "- ${FRONTEND_IMAGE}:${IMAGE_TAG}" >> ${trivyDir}/summary.md
                        echo "\\n## Backend Container Vulnerabilities" >> ${trivyDir}/summary.md
                        echo '```' >> ${trivyDir}/summary.md
                        grep -A 10 "CRITICAL\\|HIGH" ${trivyDir}/trivy-backend-report.txt | head -20 >> ${trivyDir}/summary.md
                        echo "\\n... (See full report for more details)" >> ${trivyDir}/summary.md
                        echo '```' >> ${trivyDir}/summary.md
                        echo "\\n## Frontend Container Vulnerabilities" >> ${trivyDir}/summary.md
                        echo '```' >> ${trivyDir}/summary.md
                        grep -A 10 "CRITICAL\\|HIGH" ${trivyDir}/trivy-frontend-report.txt | head -20 >> ${trivyDir}/summary.md
                        echo "\\n... (See full report for more details)" >> ${trivyDir}/summary.md
                        echo '```' >> ${trivyDir}/summary.md
                    """
                }
            }
        }

        stage('Push to Docker Hub') {
            steps {
                withCredentials([string(credentialsId: 'docker-hub-token', variable: 'DOCKER_TOKEN')]) {
                    sh '''
                        echo "${DOCKER_TOKEN}" | docker login -u rjshk013 --password-stdin
                        docker push ${BACKEND_IMAGE}:${IMAGE_TAG}
                        docker push ${FRONTEND_IMAGE}:${IMAGE_TAG}
                    '''
                }
            }
        }

        stage('Remote Deploy on Host with Docker Compose') {
            steps {
                sshagent(credentials: ['deploy-server-ssh']) {
                    sh '''
                        echo "🚀 Deploying on host with docker compose..."
                        ssh -o StrictHostKeyChecking=no user@172.18.0.1 '
                            cd /home/user/devops-projects/wanderlust-3tier-project &&
                            docker compose pull &&
                            docker compose up -d
                        '
                    '''
                }
            }
        }
    }
post {
    always {
        // Archive all Trivy reports
        archiveArtifacts artifacts: 'trivy-reports/**', fingerprint: true
    }
    success {
        slackSend(
            channel: "#jenkins-alert",
            color: "good",
            message: "✅ *BUILD SUCCESSFUL:* ${env.JOB_NAME} #${env.BUILD_NUMBER}\n🔗 <${env.BUILD_URL}|View Build Details>"
        )
    }
    failure {
        slackSend(
            channel: "#jenkins-alert",
            color: "danger",
            message: "❌ *BUILD FAILED:* ${env.JOB_NAME} #${env.BUILD_NUMBER}\n🔗 <${env.BUILD_URL}|View Build Details>"
        )
    }
}
}
📝 Note on Custom Dockerfile & Permissions
🚧 For this tutorial:
- I’ve used custom optimized Dockerfiles for both backend and frontend:
Dockerfile_optimized1for frontendDockerfile_optimised1for backend
📌 Make sure to reference these Dockerfiles in your Jenkins build or Docker Compose setup instead of the default Dockerfile.
🔐 Important: Ensure Docker can be accessed from Jenkins and other tools:
sudo chmod 666 /var/run/docker.sock
This grants the necessary permissions for the Docker CLI to run within Jenkins builds (especially when running in containers).
📈 Performance Note
In previous parts, we tested parallelism and Docker layer caching. However, for this setup:
🚫 Parallel Docker builds were avoided due to overhead in local environments
✅ A cleaner, sequential Jenkinsfile was adopted for reliability and clarity
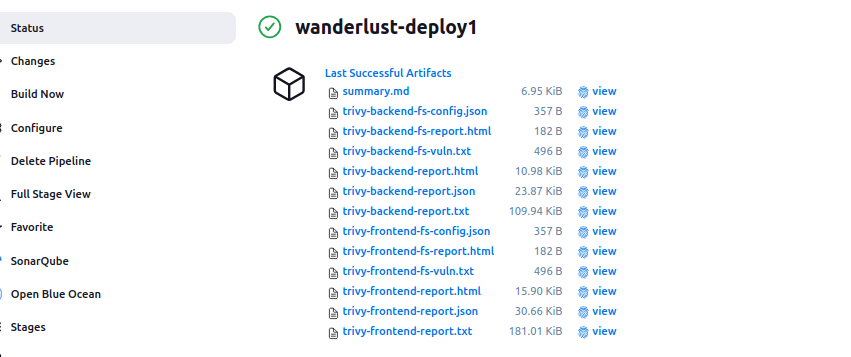
📄 Trivy Reporting Strategy
For each scan target, we generate:
- 📄
*.txt– Table report for console + markdown - 🧾
*.json– Raw report for integrations - 🌐
*.html– Easy-to-read browser view
All stored under trivy-reports/, archived, and summarized in summary.md.
Slack Notification Features
Our Slack integration includes several useful features:
- Color-Coded Status: Green for successful builds, red for failures
- Build Information: Build number and status
- Direct Link: Clickable link to the build details in Jenkins
- Automatic Delivery: Notifications sent on every build completion
This setup ensures that all team members are immediately aware of build successes and failures, improving collaboration and reducing the time to identify and fix issues.

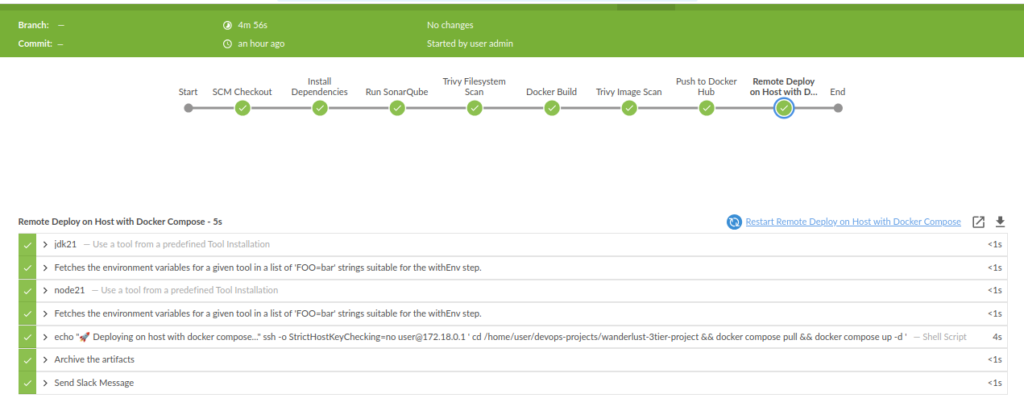
Jenkins Blue Ocean Dashboard Data
Our Blue Ocean dashboard provides clear visualization of the pipeline execution times:

After implementing our final optimizations with proper Docker layer caching:
📉 Docker Image Size Optimization – Before vs After
One of the biggest wins from this part of the tutorial was drastically reducing the Docker image size.
🛠️ Before Optimization:
- Image size: ~1 GB
- Included unnecessary dev dependencies and cache
- No layering separation
🚀 After Optimization:
- Image size: ~300 MB
- Used multi-stage builds, production-only installs, and Alpine base images
- Cleared
npmcache and ran as non-root user


🔐 Security Best Practices Implemented
✅ Runs containers as non-root users using USER appuser
✅ Dependency locking via package-lock.json & npm ci
✅ Trivy scans source code (filesystem), config, and final image
✅ Vulnerability reports stored as Jenkins artifacts
✅ Slack notifications enabled via Jenkins plugin
✅ Post-build docker system prune to save disk
Conclusion
In this third part of our CI/CD series, we’ve shown how to dramatically improve pipeline performance through Docker layer caching, optimized Dockerfiles, and parallel processing. These optimizations have reduced our build times by up to 99.5% while maintaining the robust security and quality checks established in the earlier parts of this series.
By implementing the techniques described in this guide, you can transform a slow, resource-intensive pipeline into a lean, efficient process that provides fast feedback to developers while maintaining high standards for security and code quality.
Remember, a CI/CD pipeline is never truly “finished” – it should evolve alongside your project and team needs. Stay tuned for future articles where we’ll explore advanced deployment strategies, environment management, and further security enhancements.